Your RV roof protects everything you own on the road, yet its insulation often goes unnoticed—until problems strike. Heat loss, moisture buildup, and rising energy costs can quickly turn a comfortable trip into a frustrating experience.
Worn or damaged insulation layers silently reduce efficiency and invite leaks, mold, and structural damage. Many RV owners overlook early warning signs, only to face costly repairs later. Ignoring the issue doesn’t make it disappear—it makes it worse.
Learn step-by-step RV insulation replacement here. For total peace of mind, professional RV roof repair in Michigan ensures peak efficiency and protection. Trust the experts to restore your rig’s comfort for the long haul!
What is RV Roof Insulation?
RV roof insulation acts as a thermal barrier, stabilizing interior temperatures and shielding your vehicle from environmental stress. Since relentless sun and storms accelerate material decay, maintaining your roof’s integrity is vital. Protect your investment and boost energy efficiency today. For professional maintenance, search for “RV roof repair near me in Michigan” to ensure a safe journey.
When insulation deteriorates, it compromises comfort and structural safety. Moisture intrusion becomes a major concern, as trapped water can weaken wooden components and promote mold growth—issues that rigid foam board helps prevent. Over time, even small insulation failures escalate into significant damage if left unaddressed.
Key functions of RV roof insulation include:
- Regulating indoor temperature across seasons
- Reducing noise from rain and external elements
- Preventing condensation buildup inside the roof cavity
- Supporting overall structural integrity
Understanding its importance helps you approach the installation of a high-quality EPDM roof membrane with the right mindset and attention to detail. This durable material ensures long-term protection, making a precise replacement essential for a leak-free and resilient home exterior.
Types of RV Roof Insulation:
Selecting the appropriate insulation material directly affects performance, durability, and maintenance requirements. Each type offers unique advantages and limitations, so you should evaluate your specific needs before making a decision.
Fiberglass insulation remains a popular option due to its affordability and availability. It provides decent thermal resistance and works well in dry environments. However, it loses effectiveness when exposed to moisture, which makes proper sealing essential.
Foam board insulation offers high thermal resistance and prevents water absorption. Its structural rigidity and easy customization make it perfect for tight spaces. Providing an excellent r-value for campers, it ensures RV roofs stay energy-efficient and durable against extreme outdoor temperatures.
Spray foam insulation offers superior performance by sealing gaps and stopping leaks. This airtight barrier is vital for mobile RV roof repair Michigan services, providing long-term energy efficiency and moisture resistance. Protect your investment today with a durable, professionally sealed roof!
Important factors to consider when choosing insulation:
- R-value and thermal efficiency
- Moisture resistance and durability
- Weight and compatibility with your RV structure
- Ease of installation and maintenance
By selecting the right materials, your RV roof replacement provides superior protection and vital condensation control. Making an informed choice ensures that your maintenance effort delivers lasting results, keeping your cabin dry and preventing long-term moisture damage for years to come.
Tools and Materials Needed:
A well-organized workspace and the right tools simplify replacing your RV roof insulation layers. Preparing the RV roof substrate in advance reduces downtime and ensures a secure bond, helping you maintain precision throughout each step for a durable, professional-grade finish.
You should gather essential hand tools such as a utility knife, pry bar, measuring tape, and drill. These tools allow you to remove old materials, measure accurately, and secure new insulation effectively. A caulking gun is also necessary for applying sealants evenly.
In addition to tools, high-quality materials are vital for durability. When considering the RV roof replacement cost in Michigan, investing in premium sealants and membranes ensures long-term protection. Don’t risk leaks; choose expert repair services to keep your camper safe and road-ready!
Important items to have ready:
- Replacement insulation panels or spray foam kits
- Roofing adhesive and waterproof sealant
- Protective gloves, goggles, and masks
- Cleaning supplies for surface preparation
Investing in quality RV roof insulation, like a reflective radiant barrier, reduces the likelihood of premature failure and enhances overall performance. This specialized material effectively blocks heat transfer, ensuring your vehicle stays comfortable while protecting the structure’s integrity.
Safety Precautions to Follow:
Replacing RV roof insulation carries risks, particularly when working at height. Prioritize safety by wearing gear and handling materials carefully. To ensure a professional finish and prevent future leaks, always have Dicor Lap Sealant ready to secure vents and seams once the job is complete.
Always wear appropriate protective gear, including gloves, safety glasses, and non-slip footwear. These items protect you from sharp edges, debris, and chemical exposure. Maintaining stable footing on the roof is critical, so you should avoid working in wet or windy conditions.
You should also ensure proper ventilation when using adhesives or spray foam products, especially during camper roof leak repair Michigan projects. Harmful fumes can build up in confined spaces, so trust professionals to handle repairs safely and ensure long-lasting protection for your RV.
Key safety practices include:
- Using a sturdy ladder and securing it properly
- Keeping tools organized to prevent tripping hazards
- Working with a partner when possible
- Taking breaks to avoid fatigue and maintain focus
Prioritizing safety while handling RV winterization in Michigan allows you to complete your roofing project efficiently. By taking precautions against the harsh Great Lakes climate, you ensure the job is done right without unnecessary risks to your vehicle or yourself during the off-season.
Inspecting Roof Damage:
Before you begin removing insulation, conduct a comprehensive roof inspection. This step helps identify issues that caused initial failure and ensures your 4-season RV upgrade starts on a solid foundation, protecting your rig against extreme temperatures for year-round comfort.
Look for visible signs such as cracks, punctures, and soft spots in the roof surface. Water stains or discoloration often indicate leaks that require immediate attention. Mold or mildew growth suggests prolonged moisture exposure and must be addressed thoroughly.
You must also examine structural components to ensure they remain intact. Weak or damaged sections may require reinforcement before installing new insulation—and for lasting protection, trust an RV rubber roof coating Michigan expert to prevent leaks and avoid costly repairs. Act now to keep your RV road-ready!
Important inspection points:
- Roof membrane condition and integrity
- Signs of water intrusion or pooling
- Structural stability of the roof base
- Presence of mold, mildew, or rot
A thorough inspection identifies root causes of RV roof damage, like thermal bridging, rather than just temporary symptoms. By spotting where heat transfer compromises structural integrity, you can apply lasting fixes that prevent recurring leaks and ensure your rig stays well-insulated.
Removing Old Insulation:
When removing old insulation, handle it carefully to protect your roof structure. Stay methodical to avoid costly damage. For a thorough check, search “RV roof inspection near me”—proactive repair services keep your RV safe, leak-free, and road-ready.
Start by exposing the insulation layer, which may involve lifting or cutting through the roof membrane. Use a pry bar or scraper to gently remove the material without applying excessive force. If the insulation is wet or deteriorated, it may come apart easily.
Proper disposal is essential during TPO roofing repair, especially if the old material contains mold. Use sealed bags and follow local guidelines to minimize environmental impact. Handling waste correctly ensures a safe, clean worksite while protecting the local ecosystem from contaminants.
Key removal considerations:
- Avoid damaging underlying structural components
- Remove all traces of compromised insulation
- Handle moldy materials with protective gear
- Clean the area thoroughly after removal
Removing old RV roof insulation requires patience; rushing the process risks leaving debris behind. Taking your time during this step ensures a clean foundation for the next phase, preventing mold issues and making future water damage restoration much easier for any dedicated vehicle owner.
Preparing the RV Roof Surface:
Proper preparation ensures a successful RV roof insulation project. By providing a clean, dry surface, you allow adhesives to bond with maximum strength. For a professional finish, a specialized RV roof resealing Michigan shop can provide the expertise needed to prevent future damage. Invest in your vehicle’s foundation today to ensure a long-lasting seal and total peace of mind on the road!
Begin by removing dust, debris, and old adhesive residues. You can use a brush, vacuum, or cleaning solution to achieve a smooth surface. Ensure the area is completely dry before proceeding, as moisture can compromise adhesion.
Repair cracks or damaged sections of the RV roof immediately using quality sealants. Addressing these issues often prevents a full ceiling panel replacement later. Reinforcing weak areas strengthens the structure, protects the interior, and significantly improves overall insulation performance.
Essential preparation steps:
- Clean and dry the entire surface
- Repair cracks, holes, and weak spots
- Ensure a level and stable base
- Check for any remaining contaminants
Proper RV roof surface preparation creates a solid foundation for long-lasting results. By cleaning and priming the area, you ensure that materials like spray foam insulation adhere perfectly, providing a seamless thermal barrier and structural support that keeps your vehicle protected for years.
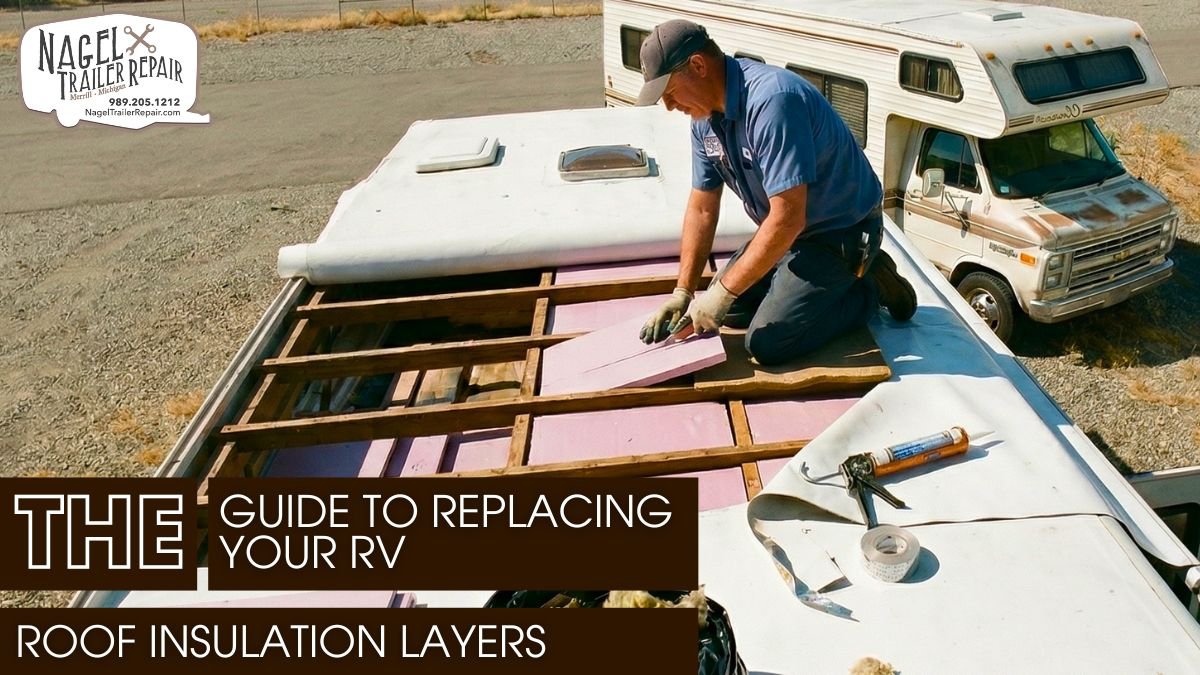
Installing New Insulation:
Upgrading RV roof insulation demands meticulous precision. To achieve peak thermal efficiency, you must measure every inch carefully and cut materials with exactness. This process ensures a seamless, snug fit that successfully eliminates performance-killing air pockets and gaps. High-quality installation keeps your living space comfortable.
Position the insulation carefully and secure it; consistent placement ensures uniform thermal performance. If leaks threaten your travels, professional emergency RV roof repair Michigan expert offers the ultimate peace of mind. Restore your rig’s integrity today and enjoy a worry-free season on the road!
When applying spray foam insulation on an RV roof, distribute the material evenly and allow it to expand fully. Adhering to manufacturer guidelines for curing time ensures a durable, weather-resistant seal. Following these steps will provide your vehicle with optimal thermal protection.
Best practices for installation:
- Measure twice and cut accurately
- Avoid gaps that reduce efficiency
- Apply even pressure for proper adhesion
- Allow sufficient curing time for materials
A precise RV roof installation—incorporating high-quality fiberglass insulation batts—maximizes thermal effectiveness and enhances overall comfort. This strategic layer ensures consistent interior temperatures, shielding your mobile home from extreme weather while improving energy efficiency.
Sealing and Weatherproofing:
Sealing and weatherproofing protect your RV roof insulation and the underlying RV roof substrate from environmental damage. This vital step prevents water intrusion, ensuring long-term durability while reinforcing vulnerable areas against leaks and rot for a safer journey.
Apply sealant to all seams, edges, and joints to form a robust, watertight barrier. Target the areas around vents, skylights, and roof openings with extra care, as these spots are the most frequent sources of RV leaks. Proactive sealing prevents water damage and ensures your vehicle stays dry and protected throughout your travels.
You can also add extra protective layers, including roofing membranes or specialized coatings, to bolster your RV roof’s defense. These additions significantly upgrade resistance to intense UV radiation and volatile weather. By shielding your roof with Flexarmor RV roofing in Michigan, you ensure durability and total surface integrity. Invest in expert repair today to protect your rig for years!
Important sealing actions:
- Seal all joints and seams thoroughly
- Reinforce high-risk areas with patches
- Inspect for gaps or weak points
- Apply protective coatings if necessary
Effective sealing with a high-quality EPDM roof membrane extends the lifespan of your RV roof insulation and significantly reduces maintenance needs. This durable barrier prevents leaks and UV damage, ensuring your vehicle stays protected and energy-efficient during every outdoor adventure.
Maintenance Tips and Final Checks:
Once you finish the installation, perform a thorough inspection to verify that your RV roof insulation is secure and performing as intended. This final check guarantees that your hard work translates into maximum thermal efficiency and comfort. By actively auditing your results, you ensure the long-term durability of your mobile home’s climate control.
To ensure a successful 4-season RV upgrade, check for proper roof insulation placement, secure adhesion, and complete sealing. You must also test the roof for leaks by simulating water exposure or inspecting thoroughly after rainfall. This prevents moisture damage, keeping your living space dry and climate-controlled year-round.
Regular maintenance keeps your insulation in optimal condition. To avoid costly damage, use professional RV rubber roof repair Michigan services to establish a routine inspection schedule. Protect your investment and travel safely—don’t wait for a leak to ruin your next adventure!
Ongoing maintenance practices:
- Inspect the roof at regular intervals
- Clean debris and dirt buildup
- Reapply sealant as needed
- Address minor issues before they escalate
Consistent care preserves your investment and ensures your RV remains comfortable and efficient. By regularly inspecting your roof and applying DICOR Lap Sealant to prevent leaks, you protect the structural integrity of your vehicle. This simple maintenance routine guarantees a safe and dry environment throughout all your travels.
The Role of Professional Maintenance:
Professional maintenance plays a critical role in keeping your RV roof system reliable, efficient, and long-lasting. While hands-on repairs and upgrades improve insulation performance and sealing quality, trained technicians bring experience, precision, and specialized tools that help you avoid costly mistakes. They inspect hidden problem areas, detect early signs of moisture intrusion, and ensure every layer—from insulation to sealant—functions as a cohesive barrier.
Experts follow proven methods to handle complex repairs, apply sealants evenly, and maintain proper ventilation, which reduces the risk of mold, leaks, and structural damage. Their attention to detail often extends the lifespan of your roof and enhances overall energy efficiency.
By combining routine professional checkups with your own maintenance efforts, you create a more resilient roofing system that performs consistently and protects your RV in all conditions.
Conclusion:
Replacing your RV roof insulation layers is more than a repair task—it’s a long-term investment in comfort, efficiency, and structural protection. When you follow a methodical approach, you prevent recurring issues and strengthen your RV against harsh environmental conditions.
By selecting the right materials, preparing the surface properly, and sealing every detail, you create a reliable insulation system that performs consistently. Each step you take directly improves thermal control, reduces energy usage, and minimizes future maintenance concerns.
Stay proactive with regular inspections and timely upkeep. Trust Nagel Trailer Repair for expert RV roof repair in Michigan to preserve your results. With the right care, your upgraded insulation will keep your RV comfortable, protected, and ready for every journey ahead. Book your service now!