


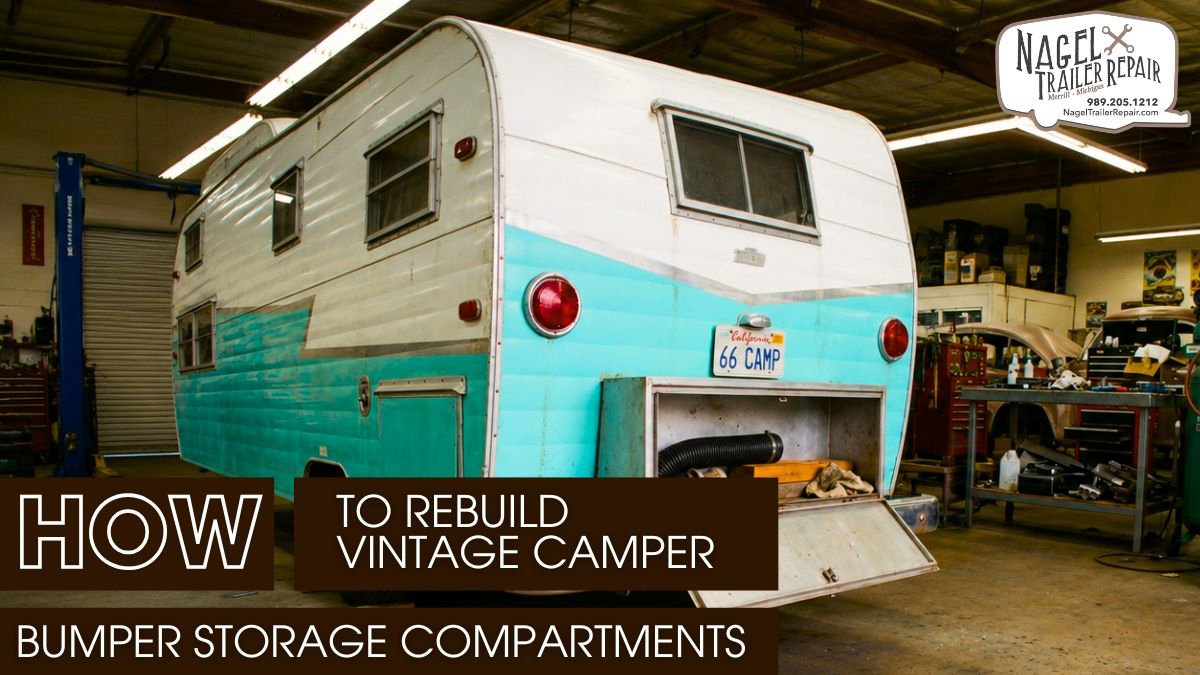
Vintage camper bumper storage compartments often suffer from rust, loose panels, and water damage after years on the road. A weak or damaged compartment not only reduces storage space but also affects the camper’s safety and appearance. Ignoring these issues can lead to costly structural repairs later.
Rebuilding the compartment may seem complicated, especially when dealing with old metal frames, worn fasteners, and outdated designs. Many camper owners struggle to find the right balance between preserving the vintage look and improving durability for modern travel needs.
This guide, backed by a vintage camper expert in Michigan, shows you how to rebuild bumper storage step by step. Learn to strengthen frames and seal out rust for lasting durability—then let us handle the heavy lifting for you.
Inspect the Old Bumper Storage:
Before tearing anything apart, inspect the entire bumper storage system carefully. Most vintage camper bumper compartments fail because moisture stays trapped inside the metal structure for years. Road salt, rainwater, and poor drainage slowly corrode the steel from the inside out. What looks solid from the outside may already have severe internal rust damage.
Start by checking the bumper mounts, frame rails, storage floor, and hinge locations. Use a flashlight to inspect internal cavities and welded corners. Surface rust usually appears flaky or discolored, while deep corrosion creates soft spots, pinholes, or swollen seams. Tap questionable areas with a hammer to identify weakened metal.
Pay close attention to:
- Lower corner seams
- Welded crossmembers
- Receiver hitch areas
- Door hinge supports
- Drainage channels
Many vintage campers used thin-gauge steel that flexed under cargo weight. Over time, vibration causes cracks near weld joints and mounting plates. If the bumper sags or shifts when pressure is applied, the internal structure likely needs reinforcement.
Take accurate measurements before removing any parts. Measure:
- Overall compartment width
- Door opening dimensions
- Frame spacing
- Bolt hole locations
- Panel thickness
Photograph the original layout from multiple angles. Those reference photos help during reassembly, especially when dealing with older campers that no longer follow factory specifications.
Remove Damaged Components:
Once the inspection is complete, begin disassembly carefully. Vintage camper bumpers can become unstable because rust weakens the internal supports. Always support the bumper assembly using jack stands before loosening hardware or cutting metal.
Disconnect trailer wiring, auxiliary lights, spare tire carriers, and any rear-mounted accessories. Label reusable components so installation becomes easier later. Spray penetrating oil on rusted fasteners several hours before removal. Many older bolts seize permanently due to oxidation, so expect to cut some hardware away.
Use an angle grinder, plasma cutter, or reciprocating saw to remove damaged sections. Cut only the weakened metal while preserving as much of the original structure as possible. Leaving solid reference points helps maintain proper alignment during rebuilding.
While removing damaged panels:
- Avoid cutting into frame rails
- Preserve mounting brackets when possible
- Remove all loose rust flakes
- Keep edges straight and square
- Protect nearby fiberglass surfaces
After disassembly, clean every exposed surface thoroughly. Use a wire wheel or abrasive flap disc to remove paint, corrosion, and oxidation. Bare metal creates stronger weld penetration and improves primer adhesion.
Apply rust converter to lightly oxidized areas and use weld-through primer on sections that require fabrication. Many rebuilds fail because builders trap untreated corrosion beneath fresh metal panels. Taking extra time during cleaning and preparation dramatically improves long-term durability.
Build a Strong New Frame:
The frame carries the entire load of the bumper storage compartment, so strength matters more than appearance during this stage. Many factory bumper frames used thin steel with minimal reinforcement. Upgrading the frame with stronger materials prevents future cracking and sagging.
Most restorers use 14- or 16-gauge square steel tubing because it provides excellent structural rigidity without excessive weight. Aluminum works well for skin panels, but steel handles vibration and towing stress far better in structural areas.
Common materials include:
- Square steel tubing
- Marine-grade aluminum sheets
- Stainless steel hinges
- Zinc-coated reinforcement plates
- Heavy-duty mounting brackets
Cut all tubing accurately using a chop saw or horizontal band saw. Dry-fit every section before welding. Measure diagonally across the frame to verify squareness. Even small alignment errors can create door fitment problems later.
MIG welding remains the preferred option for camper bumper reconstruction because it produces strong weld penetration with controlled heat. Weld short sections gradually to reduce warping on thinner materials. Continuous weld beads may distort the frame and create alignment problems.
Reinforce stress points such as:
- Hinge mounting zones
- Receiver hitch locations
- Crossmember intersections
- Stabilizer mounting points
- Corner joints
Install gusset plates wherever the structure changes direction sharply. These reinforcements spread vibration loads across larger surface areas and reduce fatigue cracking during travel.
After welding, inspect all joints carefully. Grind rough welds only when necessary because excessive grinding weakens structural integrity. A strong weld matters more than a perfectly smooth appearance.
Install New Storage Panels:
Once the frame is complete, install the exterior storage panels. Proper panel installation protects the compartment against water intrusion, vibration damage, and road debris impact. Poorly fitted panels often flex during travel and eventually break sealant lines.
Most rebuilders use aluminum sheet panels because aluminum resists corrosion and reduces overall trailer weight. Steel panels provide greater impact resistance but require more aggressive rust protection.
Before installation:
- Trim panels gradually for accuracy
- Test-fit every section
- Deburr sharp metal edges
- Pre-drill mounting holes
- Verify door clearances
Secure panels using stainless steel hardware or sealed aluminum rivets. Avoid mixing untreated steel with aluminum because galvanic corrosion develops when dissimilar metals contact moisture.
Apply butyl tape between overlapping seams before fastening the panels permanently. Butyl tape remains flexible over time and creates an excellent moisture barrier. After assembly, seal all external seams using polyurethane RV sealant designed for vibration resistance.
Focus on sealing:
- Lower corners
- Door openings
- Fastener penetrations
- Weld joints
- Drain holes
Do not overtighten fasteners. Excessive torque can warp thin metal panels and compromise sealing surfaces. Even pressure distribution prevents vibration cracks and improves structural stability.
Upgrade Storage Features:
Modern upgrades make the compartment far more functional without ruining the camper’s vintage appearance. Many original storage compartments lacked proper drainage and ventilation, which allowed condensation and road moisture to remain trapped inside.
Install drain holes at the compartment’s lowest points so water can escape quickly. Add screened vent openings to improve airflow and reduce condensation buildup during long storage periods.
Useful upgrades include:
- Rubber drain grommets
- Stainless piano hinges
- LED compartment lights
- Compression latches
- Reinforced latch plates
Modern compression latches improve weather sealing and reduce rattling during travel. Reinforced hinge backing plates also help prevent stress fractures around mounting screws.
Interior organization upgrades improve cargo stability and reduce damage caused by shifting equipment. Loose tools and heavy gear often dent sidewalls or weaken floor panels during rough road travel.
Helpful storage additions include:
- Slide-out trays
- Tie-down anchors
- Tool holders
- Battery trays
- Rubber cargo liners
If the bumper supports towing accessories or spare tire mounts, reinforce those areas using thicker backing plates and additional cross-bracing. Vintage bumper structures rarely handled modern towing loads effectively without upgrades.
Finish and Protect the Bumper:
Protective finishing determines how long the rebuilt compartment survives harsh road conditions. Even well-built steel frames will corrode quickly without proper coatings and moisture protection.
Start with epoxy primer because it bonds tightly to bare metal and blocks moisture penetration effectively. Follow with a high-build surfacer to smooth imperfections before applying automotive-grade urethane paint.
For maximum durability, apply:
- Epoxy primer
- Polyurethane seam sealer
- Urethane topcoat
- Rubberized undercoating
- Internal cavity wax
Spray internal frame cavities whenever possible. Hidden corrosion usually begins inside enclosed tubing where trapped moisture remains undetected.
After painting, reinstall the compartment door and verify alignment carefully. Check hinge movement, latch engagement, and gasket compression. A properly aligned door should close evenly without excessive pressure.
Perform a final water test using a hose to identify leaks around seams, hardware, and corners. Inspect all electrical connections, bumper mounts, and cargo supports before road use.
A properly rebuilt vintage camper bumper storage compartment should handle vibration, moisture, heavy cargo, and long-distance travel without structural movement or water intrusion. Strong fabrication methods, corrosion-resistant materials, and careful sealing techniques ensure the compartment stays functional and reliable for many years.
The Role of Professional Maintenance:
Professional maintenance plays a major role in preserving the safety, durability, and performance of older campers and trailers. Experienced technicians can identify hidden rust, weakened welds, suspension wear, and frame stress before those problems turn into expensive structural damage. Regular inspections also help maintain proper alignment, improve towing stability, and prevent uneven load distribution during travel.
Skilled repair work ensures that storage compartments remain weatherproof and structurally secure while suspension components continue handling road vibration safely. Professionals also use the correct sealants, reinforced hardware, and corrosion-resistant coatings that extend the life of vintage trailer systems. Consistent maintenance not only protects the trailer’s original character but also improves reliability for long-distance trips and long-term storage.
Conclusion:
Rebuilding vintage camper bumper storage compartments requires careful planning, accurate measurements, and strong fabrication techniques. When you repair rust damage properly and reinforce weak structural areas, the rebuilt compartment becomes safer, stronger, and more reliable for long-distance travel.
Using corrosion-resistant materials, waterproof sealants, and reinforced mounting points helps extend the life of the bumper system. Proper drainage and ventilation also reduce future moisture damage inside the compartment.
Restoring a bumper storage compartment preserves a vintage camper’s charm while boosting road readiness. For expert care, Nagel Trailer Repair offers unmatched skill. Trust the premier vintage camper expert in Michigan to enhance your trailer’s durability and hit the road with confidence.