Dreaming of comfortable camper adventures in every season? Proper wall insulation can make the difference between a cozy retreat and an uncomfortable ride. Whether you’re exploring snowy mountains or camping under the summer sun, the right insulation helps regulate temperature and improve overall living conditions.
Many camper owners struggle with heat loss, excessive heat gain, condensation, and rising energy costs. Poorly insulated walls can create discomfort, encourage moisture buildup, and even lead to long-term damage that affects both your vehicle and your travel experience.
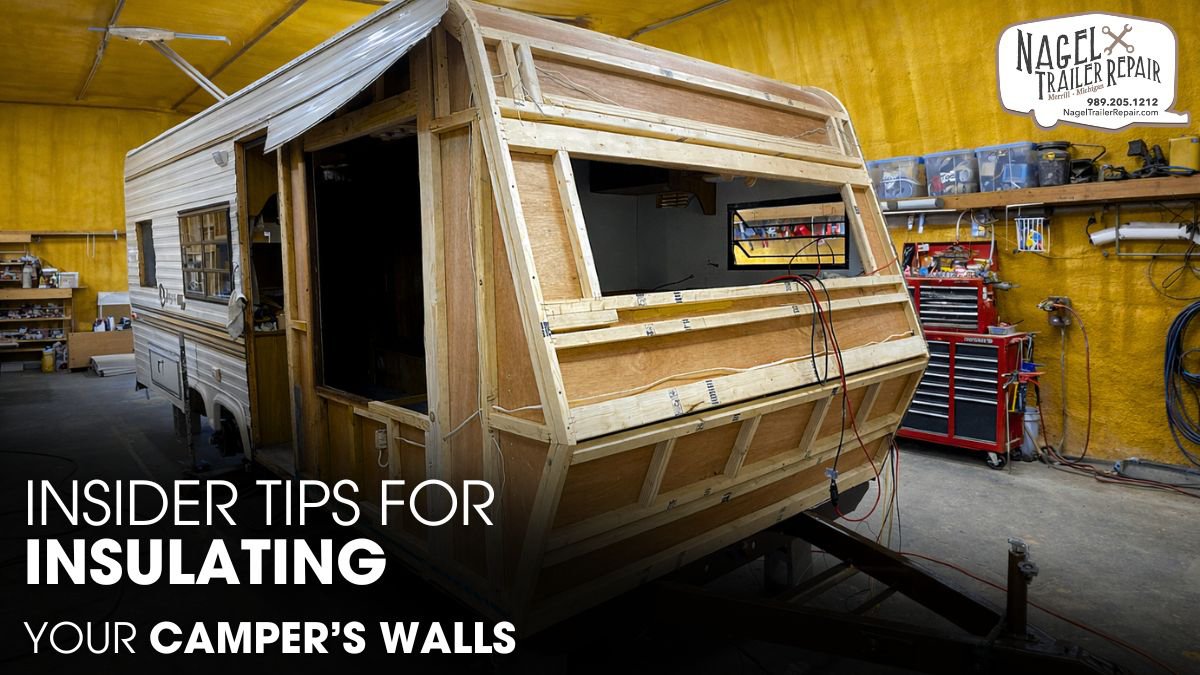
The good news is that effective camper wall insulation doesn’t have to be complicated. In this guide, you’ll discover insider tips from a camper expert in Michigan—helping you select materials, avoid mistakes, control moisture, and maximize efficiency. Ready for a more comfortable journey? Trust professional camper repair services to get it done right.
Why Camper Wall Insulation Matters?
Many camper owners view insulation as a simple comfort upgrade, but its role extends far beyond keeping the interior warm during winter. In reality, wall insulation functions as a critical component of your camper’s thermal envelope. It controls heat flow, manages moisture, improves energy efficiency, and helps protect the structure from long-term damage.
Unlike traditional houses, campers face constant exposure to changing environmental conditions. During a single trip, your vehicle may experience freezing nights, intense solar radiation, strong winds, and high humidity levels. Because camper walls are relatively thin, external temperatures can quickly influence indoor comfort.
Heat naturally moves from warmer areas to cooler ones through three primary mechanisms:
- Conduction through solid materials
- Convection through moving air
- Radiation through infrared energy transfer
The metal framing used in many camper vans creates a particularly challenging issue known as thermal bridging. Metal conducts heat significantly faster than insulation materials, allowing energy to bypass insulated wall cavities. As a result, interior surfaces near structural ribs often become colder than surrounding areas.
These temperature differences can create several problems:
- Increased heating and cooling costs
- Interior cold spots
- Surface condensation
- Reduced occupant comfort
- Higher battery consumption during off-grid travel
Proper insulation slows heat transfer and stabilizes interior temperatures. It also helps maintain warmer interior wall surfaces during cold weather, reducing the likelihood of condensation formation. This benefit becomes especially important because hidden moisture can trigger mold growth, corrosion, wood rot, and insulation degradation.
In addition to thermal performance, wall insulation improves acoustic comfort by reducing road noise, rain impact sounds, and external environmental noise. For full-time travelers, these improvements significantly enhance overall living conditions.
Choosing the Right Insulation Material:
Choosing insulation for a camper requires more than simply selecting the highest R-value available. While thermal resistance matters, moisture resistance, installation quality, durability, weight, and air-sealing capability also play major roles in overall performance.
Closed-cell spray foam remains one of the most technically advanced insulation solutions available for mobile applications. During installation, the foam expands and fills irregular cavities, creating both insulation and an air barrier. This dual function reduces heat transfer while limiting uncontrolled air movement.
Advantages of closed-cell spray foam include:
- High R-value per inch
- Excellent air-sealing properties
- Moisture resistance
- Structural reinforcement benefits
- Long service life
However, spray foam typically costs more than other insulation options and can make future modifications difficult because it permanently bonds to surrounding surfaces.
Rigid foam boards offer another highly effective solution. Polyisocyanurate (Polyiso), extruded polystyrene (XPS), and expanded polystyrene (EPS) remain popular choices among professional camper builders.
Polyiso provides excellent thermal performance, often delivering one of the highest R-values per inch among rigid insulation products. XPS offers superior moisture resistance and compressive strength, making it suitable for areas exposed to vibration and movement. EPS provides a more budget-friendly alternative while still offering reasonable insulation performance.
Other commonly used materials include:
- Mineral wool insulation
- Sheep’s wool insulation
- Fiberglass batts
Mineral wool performs exceptionally well in terms of fire resistance and sound absorption. It also maintains dimensional stability under varying temperatures. Sheep’s wool attracts environmentally conscious builders because it naturally regulates moisture while providing good thermal and acoustic performance.
When comparing insulation products, evaluate the following characteristics:
- Thermal resistance (R-value)
- Vapor permeability
- Water absorption rate
- Fire performance
- Weight contribution
- Compression resistance
- Long-term durability
The best insulation choice depends on your climate, budget, travel style, and construction goals rather than a single performance metric.
Preparing Camper Walls for Insulation:
Successful insulation projects begin long before the first insulation panel enters the wall cavity. Proper preparation determines how effectively the insulation performs throughout the life of the camper.
Start by exposing the wall structure completely. Remove interior wall panels and inspect every accessible cavity. Many older campers conceal water damage behind decorative finishes, making visual inspection essential.
Carefully examine:
- Window openings
- Roof seams
- Door frames
- Utility penetrations
- Structural supports
- Factory-installed insulation
Even minor water intrusion can create significant problems once insulation traps moisture inside the wall assembly. Address all leaks before proceeding with installation.
Rust treatment also deserves special attention. Surface corrosion on steel framing members can spread rapidly when moisture becomes trapped behind insulation. Remove corrosion, apply appropriate rust inhibitors, and ensure surfaces remain dry before continuing.
Accurate measurements become particularly important because camper walls rarely feature uniform geometry. Curved rooflines, reinforcement ribs, electrical pathways, and structural supports create complex cavities that require custom-fitted insulation pieces.
Before installation:
- Remove dirt and debris
- Clean bonding surfaces
- Repair damaged framing
- Map electrical systems
- Plan plumbing routes
- Verify cavity dimensions
Many professional builders create detailed insulation templates using cardboard before cutting expensive materials. This approach reduces waste while improving installation precision. Proper preparation may seem time-consuming, but it prevents many of the performance issues commonly associated with poorly insulated campers.
Installation Techniques for Better Results:
Even premium insulation materials can fail if installers use poor techniques. Small gaps, air leaks, and thermal bridges can dramatically reduce overall wall performance.
One of the most important principles involves creating a continuous insulation layer. Heat naturally seeks the path of least resistance. Any interruption in the insulation system allows energy to bypass protected areas.
When installing rigid foam insulation, cut panels precisely to fit each cavity. Avoid excessive compression because compressed insulation often loses effectiveness. Small perimeter gaps should be sealed using low-expansion foam designed for insulation applications.
Air sealing plays an equally important role. Research consistently shows that uncontrolled air leakage can account for a substantial percentage of thermal losses in enclosed structures.
Pay close attention to:
- Wiring penetrations
- Plumbing openings
- Structural joints
- Window frames
- Door connections
- Roof transitions
Warm air carries moisture. When air leakage occurs, moisture often migrates into hidden cavities where condensation can develop. Effective air sealing minimizes this risk while improving overall thermal performance.
Thermal bridging remains one of the most overlooked aspects of camper insulation. Metal framing members conduct heat far more efficiently than insulation materials. Even if wall cavities contain high-performance insulation, exposed metal ribs can significantly reduce overall effectiveness.
Many experienced builders address thermal bridging by installing a continuous insulation layer over structural members before attaching interior finishes. This method interrupts conductive pathways and improves whole-wall thermal performance.
The most successful installations combine insulation, air sealing, and thermal bridge mitigation into a single integrated system rather than treating each element separately.
Managing Moisture and Ventilation:
Moisture management represents one of the most technically demanding aspects of camper insulation design. Many insulation systems fail not because of insufficient R-value but because trapped moisture gradually damages materials from within.
A typical camper generates substantial humidity every day. Occupants continuously release water vapor through breathing, cooking, showering, and normal living activities. In a compact interior space, humidity levels can rise quickly.
Problems begin when warm humid air encounters cold surfaces. Once surface temperatures fall below the dew point, condensation forms. This process often occurs inside wall cavities where moisture remains hidden from view.
Potential consequences include:
- Mold growth
- Corrosion of metal components
- Rotting of wooden structures
- Reduced insulation performance
- Adhesive failures
- Poor indoor air quality
Many camper repair experts place heavy emphasis on vapor barriers when addressing moisture control in camper walls. However, moisture problems are often caused by air leaks rather than vapor diffusion. Even a small opening can allow a significant amount of moisture-laden air to pass through, carrying far more moisture than what typically moves through solid wall materials by diffusion alone.
Because of this, modern insulation methods focus on creating a tight air seal throughout the wall structure. Limiting unwanted airflow helps reduce moisture intrusion, protects insulation performance, and lowers the risk of mold, rot, and other moisture-related damage inside the camper’s walls.
Effective moisture-control practices include:
- Comprehensive air sealing
- Leak prevention
- Controlled ventilation
- Thermal bridge reduction
- Humidity monitoring
- Regular maintenance inspections
Ventilation remains essential regardless of insulation quality. Roof vents, powered exhaust fans, and cross-flow ventilation systems help remove moisture before it reaches critical levels.
Maintaining indoor humidity between 30% and 50% generally provides the best balance between comfort and condensation prevention. A simple digital hygrometer can help monitor conditions and identify potential problems before damage occurs.
Expert Tips for Long-Lasting Performance:
Proper insulation delivers the best results when it is part of a well-planned temperature control system throughout the camper. Focusing only on the walls may not provide the desired comfort or energy efficiency if other sections of the vehicle are left without adequate insulation.
The roof is often a major source of heat loss since warm air naturally moves upward. At the same time, insufficient floor insulation can make the interior feel colder, especially during winter trips, creating uncomfortable spots that affect overall camping comfort.
For maximum efficiency, consider upgrading:
- Roof insulation
- Floor insulation
- Window coverings
- Door weatherstripping
- Vent insulation inserts
- Thermal break systems
Advanced builders increasingly use infrared thermal imaging to evaluate insulation performance. Thermal cameras reveal hidden air leaks, thermal bridges, and underperforming areas that remain invisible during visual inspections.
Routine inspections also play an important role in maintaining long-term performance. Examine sealants, roof penetrations, windows, and door frames at least once per year.
Watch for warning signs such as:
- Persistent condensation
- Rising energy consumption
- Interior cold spots
- Water staining
- Mold growth
- Drafts near structural members
Addressing small issues early prevents costly repairs later. A well-designed insulation system can provide decades of reliable performance when properly maintained.
Ultimately, the highest-performing camper walls combine quality insulation materials, effective air sealing, thermal bridge reduction, moisture management, and adequate ventilation. When these elements work together, they create a durable, energy-efficient, and comfortable living environment capable of handling a wide range of climates and travel conditions.
The Role of Professional Maintenance:
Professional maintenance plays a vital role in protecting your camper’s performance, appearance, and long-term value. While routine DIY care helps, experienced technicians can identify hidden issues that often go unnoticed, such as moisture intrusion behind wall panels, deteriorating seals, insulation gaps, or surface damage caused by improper cleaning methods.
Regular inspections help maintain thermal efficiency, prevent mold growth, and ensure that exterior finishes remain protected from environmental wear. Professionals also use specialized tools and products that minimize the risk of damage during camper washing and maintenance procedures.
By scheduling periodic expert service, you can address small problems before they become costly repairs, improve your camper’s durability, and enjoy a safer, more comfortable travel experience throughout the year.
Conclusion:
Insulating your camper’s walls is one of the most valuable investments you can make for comfort, energy efficiency, and long-term durability. The most successful insulation projects combine high-performance materials, proper installation techniques, moisture control strategies, and effective ventilation systems.
To keep your camper comfortable in any climate, focus on insulation, stopping thermal bridges, sealing air leaks, and balancing moisture. For professional care, trust Nagel Trailer Repair—the camper expert in Michigan—to protect your RV’s structure and ensure lasting performance. Schedule your repair today!