Your classic trailer deserves more than a cosmetic upgrade—it needs a strong, stable foundation. A worn chassis doesn’t just affect performance; it compromises safety, handling, and long-term value. If you want your restoration to truly last, the frame is where it begins.
Over time, rust, stress fractures, and poor repairs weaken the chassis. Many restorers focus on appearance and overlook structural integrity, only to face instability, uneven weight distribution, or costly failures later. Ignoring the frame can undo all your hard work.
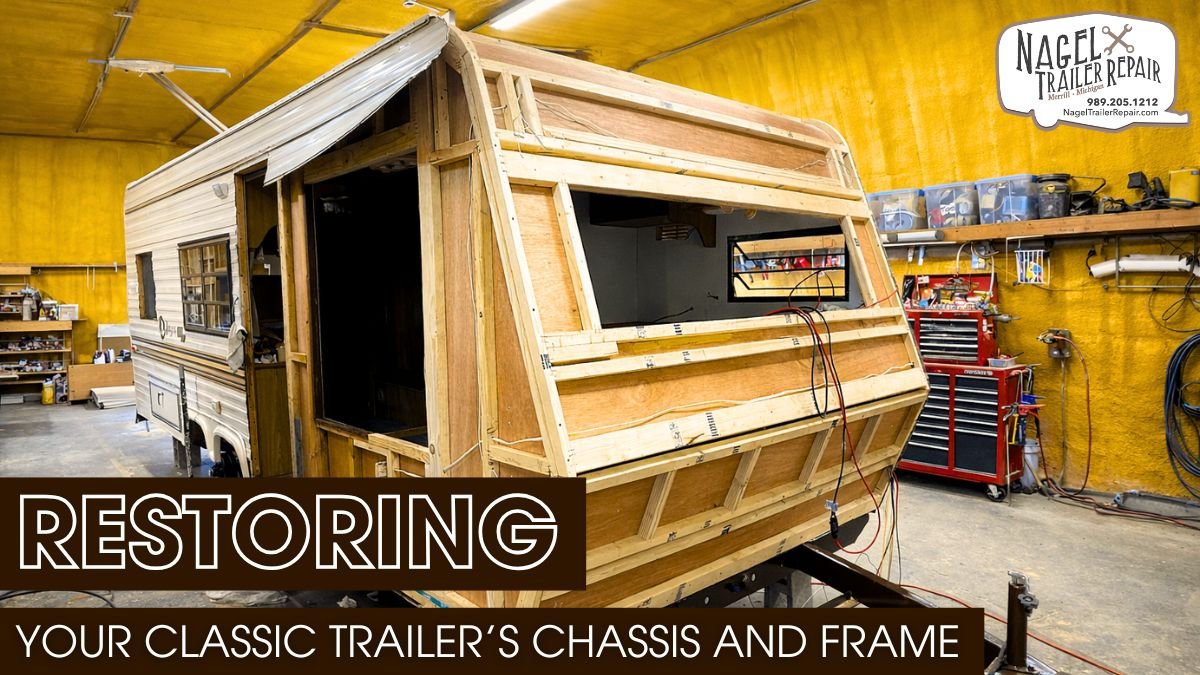
Mastering classic trailer repairs in Michigan starts with this chassis restoration guide. Rebuild strength and stability to ensure your vintage rig performs reliably for years. Ready to hit the road? Let the experts revive your timeless icon!
Assessing Chassis Condition:
You should start your restoration by understanding exactly what you’re working with. A trailer chassis may look solid at first glance, but hidden corrosion, fatigue cracks, and subtle distortions can quietly compromise its strength. If you skip a detailed inspection, you risk building everything else on a weak foundation.
Begin by exposing bare metal wherever possible. Old paint, undercoating, and grime often hide structural flaws. Use a wire brush, scraper, or needle scaler to clean critical areas like crossmembers, spring hangers, and the tongue. These zones handle the highest stress and usually show the earliest signs of failure.
Pay close attention to welds. Cracks often form at weld toes due to repeated stress cycles. If you suspect fatigue, use dye penetrant testing to reveal fine cracks that you cannot see easily. Even small fractures can grow quickly under load.
Next, check alignment. Stretch a string line along the frame or use a laser level to identify twists or bends. Measure diagonals from corner to corner—if the numbers don’t match, the frame has shifted out of square. This misalignment can affect axle tracking and lead to uneven tire wear.
Also, assess material thickness. Corrosion doesn’t just sit on the surface—it eats into the steel. Use calipers or a thickness gauge to determine how much material remains. If the metal has lost significant thickness, you’ll need to replace sections instead of repairing them.
Focus on these essentials during inspection:
- Look for cracks around weld joints
- Measure frame squareness and symmetry
- Check suspension mounting points
- Identify deep rust or metal loss
- Inspect for bends or structural distortion
A careful assessment saves time later and ensures you fix the real problems, not just the visible ones.
Planning the Restoration:
Once you understand the chassis condition, you need a clear plan. Restoration without planning often leads to wasted effort and inconsistent results. Think of this stage as setting the engineering foundation for your project.
Start by calculating load requirements. Determine the Gross Trailer Weight (GTW) and estimate how the weight distributes across the frame. Ideally, tongue weight should fall between 10–15% of total weight. This balance keeps the trailer stable during towing and reduces sway.
Choose your materials carefully. Standard mild steel like ASTM A36 works for many repairs, but high-stress areas benefit from stronger materials such as A572 steel. Always match or exceed the original thickness of the frame to maintain structural integrity.
Consider how forces move through the chassis. Acceleration, braking, and cornering all create dynamic loads. Reinforce areas where these forces concentrate, such as joints and transitions. Avoid randomly adding metal; instead, strengthen the frame strategically.
Prepare your workspace as well. Work on a flat, level surface to prevent alignment errors. Use sturdy jack stands or a frame table to hold the chassis in position. Stability during repairs is critical for accuracy.
Make sure you have the right tools ready:
- MIG welder for structural joints
- TIG welder for precision work
- Angle grinder and cutting tools
- Clamps and magnetic squares
- Torque wrench for assembly
Take time to document the original frame layout. Photos, notes, and measurements will help you restore the geometry correctly. Good planning reduces guesswork and improves the final outcome.
Disassembly and Cleaning:
You need to strip the trailer down completely before making any structural repairs. Partial disassembly leaves hidden issues untouched and limits your ability to work effectively.
Remove all components attached to the frame. This includes axles, suspension parts, brake systems, wiring, and body mounts. As you remove parts, label and organize them carefully. This step will save you from confusion during reassembly.
Once the frame stands alone, focus on cleaning. Surface preparation plays a huge role in both welding quality and coating durability. The cleaner the metal, the better your results.
Abrasive blasting offers the best results. It removes rust, paint, and contaminants while creating a surface profile that helps coatings adhere. If blasting isn’t available, use an angle grinder with flap discs or wire wheels. Make sure you reach tight corners and weld seams.
After mechanical cleaning, degrease the entire frame. Oil and grease can interfere with weld penetration and paint adhesion. Use a solvent cleaner to remove all residues.
Key preparation steps include:
- Remove all non-structural components
- Clean metal to bare steel
- Eliminate grease and contaminants
- Reach corners and hidden areas
- Reinspect for hidden damage
A properly cleaned frame reveals its true condition and sets the stage for high-quality repairs.
Repairing Frame Damage:
This is where your technical skill matters most. Structural repairs must restore strength without introducing new weaknesses. Every weld, cut, and reinforcement affects how the frame handles stress.
Start by repairing cracks. Drill small holes at each end of the crack to stop it from spreading. Then grind a groove along the crack and weld it fully. This ensures strong penetration and long-term durability.
Use proper welding techniques. MIG welding works well for most structural repairs because it provides strong, consistent joints. Maintain correct settings and avoid overheating the metal, which can cause distortion.
If the frame has bent sections, straighten them carefully. Use a hydraulic press or controlled force. In some cases, you can apply localized heat to relieve stress, but avoid excessive heating that weakens the steel.
For severely damaged areas, replace the section entirely. Cut out the compromised metal and fabricate a new piece with matching dimensions. Reinforce the joint with gussets or fish plates to distribute stress more evenly.
Keep these points in mind during repairs:
- Maintain original frame geometry
- Use full-penetration welds
- Reinforce high-stress areas
- Avoid overlapping weld seams
- Check alignment continuously
Precision at this stage ensures the chassis regains its full structural capacity.
Rust Treatment and Protection:
After repairs, you need to protect the chassis from future corrosion. Rust never truly stops unless you address it properly, so this step is critical for long-term durability.
Begin with a rust converter. These products react with remaining rust and turn it into a stable compound. This step prevents further oxidation beneath your coatings.
Apply an epoxy primer next. Epoxy forms a strong bond with the metal and creates a barrier against moisture. Make sure you cover every surface, including corners and joints.
Follow up with a durable topcoat. Polyurethane coatings work well for chassis applications because they resist impact and weathering. Apply multiple layers for better protection.
Seal all seams and joints. Water often enters through small gaps and causes hidden corrosion. Use seam sealer to block these entry points.
Protective steps to follow:
- Neutralize rust with chemical treatment
- Apply high-quality epoxy primer
- Use durable topcoat layers
- Seal joints and seams بالكامل
- Inspect hidden areas for corrosion
A strong coating system extends the life of your chassis and reduces future maintenance.
Reassembly and Stability Checks:
Once the frame is restored and protected, you can begin reassembly. This stage requires patience and attention to detail because small errors can affect overall stability.
Start with suspension components. Install axles carefully and ensure they align perfectly with the frame. Misalignment can cause poor handling and uneven tire wear.
Use high-grade fasteners for all structural connections. Torque each bolt according to specifications and apply thread-locking compounds where needed. Loose fasteners can compromise safety.
After assembly, perform load testing. Gradually add weight to simulate real conditions and observe how the frame responds. Check for deflection and ensure the load distributes evenly.
Finally, conduct a road test. Begin at low speeds and increase gradually. Pay attention to vibrations, braking performance, and overall stability.
Important final checks include:
- Verify axle alignment
- Confirm torque on all fasteners
- Test load distribution
- Check for unusual flex
- Perform controlled road testing
A well-assembled chassis delivers smooth handling and reliable performance on the road.
The Role of Professional Maintenance:
You can handle many restoration and repair tasks on your own, but professional maintenance plays a critical role in keeping your trailer and camper reliable on the road. Experienced technicians don’t just fix visible issues—they evaluate structural integrity, alignment, and load behavior using precise tools and proven methods.
Their insight helps you catch hidden frame fatigue, axle misalignment, and braking inefficiencies before they turn into serious problems.
Regular professional inspections also prepare you for unexpected breakdowns. Mechanics can identify weak components, worn suspension parts, or electrical faults that often fail under travel stress. This proactive approach reduces the risk of roadside emergencies and gives you confidence during long trips.
When issues do arise, having a professionally maintained setup makes troubleshooting faster and safer. You spend less time guessing and more time resolving problems efficiently, ensuring your journey stays smooth and controlled.
Conclusion:
A strong chassis transforms your classic trailer into a dependable machine. When you focus on structural integrity, you improve not just stability but also safety and longevity. Every precise repair contributes to better performance.
Treat the restoration process with care and discipline. Proper inspection, accurate repairs, and effective protection ensure the frame withstands real-world conditions. Skipping steps often leads to future failures.
With a properly restored chassis from Nagel Trailer Repair, you can tow with confidence. Our classic trailer repairs in Michigan ensure your vintage gem handles loads efficiently and tracks straight. Restore stability and preserve value—let’s get your icon back on the road today!