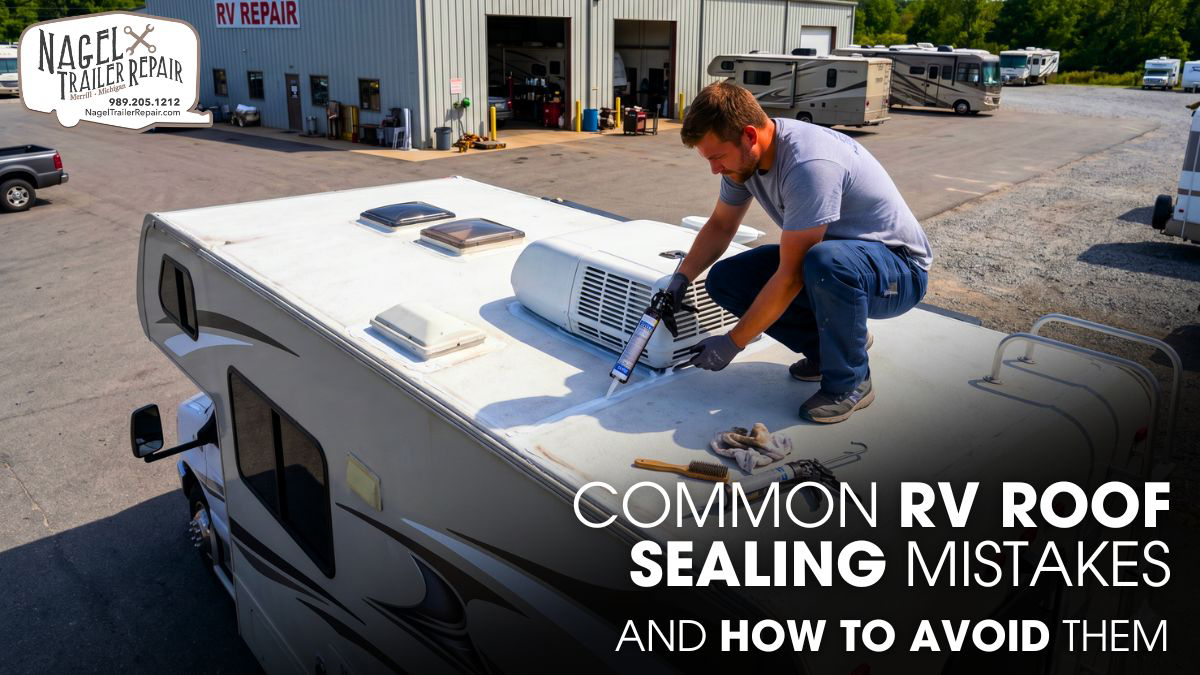
A small crack in your RV roof seal may not seem like a big deal, but it can quickly lead to costly water damage, mold growth, and structural issues. Many RV owners unknowingly make simple sealing mistakes that shorten the life of their roofs and increase repair expenses.
The problem is that roof sealing is often treated as a one-time task rather than a careful maintenance process. Using the wrong sealant, skipping surface preparation, or applying products in poor weather conditions can all reduce the effectiveness of the repair and leave your RV vulnerable to leaks.
The good news is that most RV roof sealing mistakes are completely avoidable. By following proven maintenance practices and seeking guidance from an experienced RV roof expert in Michigan, you can prevent costly damage, extend your roof’s lifespan, and keep your RV adventure-ready. Professional roof repair services help ensure lasting protection and peace of mind.
Why Proper RV Roof Sealing Matters?
Many RV owners pay close attention to their engine, tires, and appliances but often overlook the roof. However, the roof is one of the most important protective components of any RV. It shields the vehicle from rain, snow, UV radiation, falling debris, and temperature extremes. When the roof sealing system begins to fail, moisture can enter hidden areas and cause damage long before any visible signs appear.
Unlike residential roofs, RV roofs constantly move. Every mile traveled creates vibration and flexing throughout the structure. In addition, daily temperature changes cause roofing materials to expand during the day and contract at night. These continuous movements place stress on roof seams, vents, skylights, antennas, solar panel mounts, and air-conditioning units. As a result, sealants must remain flexible enough to move with the roof without cracking or separating.
Most modern RVs feature EPDM rubber, TPO membrane, fiberglass, aluminum, or PVC roofing systems. Each material has different expansion rates, surface characteristics, and maintenance requirements. Proper roof sealing helps accommodate these differences while maintaining a reliable waterproof barrier.
When sealants fail, RV owners may face several costly issues, including:
- Water intrusion beneath the roof membrane
- Wet insulation that loses thermal efficiency
- Mold and mildew growth
- Structural wood rot
- Corrosion of electrical components
- Interior ceiling damage
- Sidewall delamination
A small leak can often travel several feet through insulation, framing, and wiring channels before becoming visible inside the RV. By the time a water stain appears on the ceiling, significant damage may already exist. This is why proper roof sealing plays such a critical role in protecting the long-term value and structural integrity of an RV.
Using the Wrong Sealant Type:
Choosing the wrong sealant is one of the most common mistakes RV owners make. Many assume that any waterproof caulk can provide adequate protection, but RV roofing systems require specialized products designed to withstand constant movement and harsh outdoor conditions.
Different roofing materials require different sealant formulations. For example, EPDM rubber roofs require products that can bond effectively to synthetic rubber surfaces. TPO roofs need sealants specifically designed for thermoplastic membranes. Fiberglass roofs often perform best with polyurethane or hybrid polymer products that provide strong adhesion and long-term flexibility.
Several sealant types are commonly used in the RV industry:
- Self-leveling lap sealants
- Non-sag lap sealants
- Polyurethane sealants
- Butyl-based sealants
- Elastomeric sealants
- Hybrid polymer sealants
One particularly common mistake involves using household-grade silicone products. While silicone may appear waterproof, many standard formulations do not bond well to RV roofing materials over the long term. Additionally, cured silicone often creates surface contamination that makes future repairs more difficult because many sealants cannot properly adhere to silicone residue.
When selecting a sealant, it is important to evaluate several technical properties:
- UV resistance
- Tensile strength
- Elongation capability
- Weather resistance
- Adhesion performance
- Cure characteristics
- Material compatibility
High-quality RV sealants are engineered to resist ultraviolet degradation, maintain elasticity, and withstand years of thermal expansion and contraction. Selecting the correct product for the specific roof material greatly increases repair longevity and reduces the likelihood of future leaks.
Skipping RV Roof Surface Preparation:
Even the highest-quality sealant cannot perform properly if it is applied to a poorly prepared surface. Surface preparation directly influences adhesion strength and overall repair durability.
Over time, RV roofs accumulate contaminants from various environmental sources. Dirt, dust, oxidation, tree sap, road grime, pollen, mold, and algae can all interfere with proper bonding. If these contaminants remain on the roof, the sealant bonds to the debris rather than the roofing material itself.
As exposure to weather continues, the contamination layer gradually breaks down and separates from the surface. Once this occurs, the sealant lifts away and creates openings for water intrusion.
Before applying new sealant, carefully inspect the roof for:
- Cracked sealant
- Loose sealant edges
- Surface contamination
- Membrane damage
- Exposed fasteners
- Signs of water intrusion
Removing deteriorated sealant is equally important. Applying fresh material over old, failing sealant may temporarily improve appearance, but it rarely provides a durable repair. Any sealant that shows cracking, shrinking, lifting, or loss of flexibility should be removed before resealing.
Most professionals use:
- Plastic scrapers
- Non-abrasive brushes
- Specialized removal tools
- Manufacturer-approved cleaning agents
Aggressive metal tools should be avoided because they can damage roofing membranes and create additional leak points.
After cleaning, the roof surface must dry completely. Trapped moisture can weaken adhesion, interfere with curing, and eventually lead to blistering or premature failure. Although proper preparation requires additional time, it significantly improves repair quality and long-term performance.
Applying Roof Sealant Incorrectly:
Proper RV roof repair involves more than choosing the right sealant and preparing the surface correctly. Even high-quality products can fail when applied improperly. Many leaks and sealing issues occur because the sealant is not spread evenly or is installed without following recommended application methods.
A sealant acts as a protective waterproof layer designed to keep moisture from entering vulnerable areas. For reliable performance, it must fully cover seams, joints, screws, vents, and other roof openings. Missing even small sections or leaving thin spots, gaps, or trapped air can weaken the barrier, allowing water to penetrate and eventually cause damage beneath the roof surface.
Common application errors include:
- Uneven bead sizes
- Incomplete seam coverage
- Excessive sealant buildup
- Thin application areas
- Air pocket formation
- Failure to cover screw heads
- Disturbing sealant during curing
Self-leveling lap sealants require particular attention. These products are designed to flow naturally after application and create a smooth, continuous waterproof membrane. Many DIY repairs fail because owners attempt to smooth or reshape the sealant before it finishes leveling. This can disrupt the product’s designed flow characteristics and create weak points.
Applying excessive amounts of sealant can also cause problems. Thick layers may cure unevenly, creating internal stresses as the material hardens. Over time, these stresses can contribute to cracking, shrinkage, or separation.
For optimal results:
- Follow manufacturer application guidelines.
- Maintain consistent bead dimensions.
- Cover all seams completely.
- Seal fastener heads thoroughly.
- Allow self-leveling products to flow naturally.
- Inspect repairs immediately after application.
Professional RV technicians often perform a secondary inspection before the sealant cures. This quality-control step helps identify missed areas and significantly improves long-term waterproofing performance.
RV Roof Sealing in Poor Weather:
Weather conditions have a major impact on sealant performance. Even premium products can fail if environmental conditions are not suitable during application and curing.
Most RV sealants depend on chemical curing processes that are highly sensitive to temperature and humidity. Conditions outside the manufacturer’s recommended range can reduce adhesion and shorten service life.
Cold temperatures create several challenges. As temperatures drop, sealants become thicker and more difficult to apply evenly. Increased viscosity may prevent the material from flowing properly into seams and gaps, reducing bonding effectiveness.
Hot weather presents a different set of concerns. High temperatures can accelerate surface curing, causing the outer layer to skin over before the sealant fully bonds to the substrate. Rapid curing may also increase shrinkage and internal stress.
Environmental factors that affect sealant performance include:
- Air temperature
- Roof surface temperature
- Humidity levels
- Wind exposure
- Rainfall
- Morning dew
Many RV owners focus solely on avoiding rain. However, dew formation can be equally problematic. A roof that appears dry may still contain enough surface moisture to interfere with adhesion.
Ideal sealing conditions generally include:
- Dry roof surfaces
- Moderate temperatures
- Stable weather conditions
- Low humidity
- Minimal wind
- No precipitation forecast
Checking weather forecasts and allowing sufficient curing time can significantly improve repair durability and overall roof protection.
Neglecting Regular RV Roof Inspections:
Many RV owners wait until a leak appears before checking the condition of their roof. By that stage, moisture may have already reached underlying materials and caused damage that is not immediately visible.
Constant exposure to sunlight, changing temperatures, rain, and other outdoor elements gradually weakens roof sealants. As they age, these materials can lose their ability to remain flexible and maintain a secure bond.
Regular roof inspections help detect small cracks, gaps, or worn sealant before they become serious issues. Addressing these early warning signs can prevent costly repairs and extend the life of the RV roof.
A thorough inspection should include:
- Roof seams
- Skylights
- Roof vents
- Air-conditioning units
- Solar panel mounts
- Antennas
- Ladder attachment points
- Existing sealant condition
Industry professionals typically recommend inspecting the roof at least twice per year. Additional inspections should be performed after severe storms, hail events, extended storage periods, or impacts from falling branches.
During inspections, watch for:
- Cracks
- Shrinkage
- Edge lifting
- Discoloration
- Bubbling
- Hardening
- Sealant separation
These signs often indicate that the sealant is nearing the end of its service life and requires attention.
Preventive maintenance is always more cost-effective than major repairs. A simple inspection that identifies a small sealing defect can prevent extensive damage to insulation, roof decking, framing, electrical systems, and interior finishes. Consistent inspections allow RV owners to address problems early and maintain a reliable waterproof barrier year after year.
The Role of Professional Maintenance:
Professional maintenance plays a vital role in protecting an RV roof from premature wear and costly water damage. Experienced technicians know how to identify early signs of sealant failure, surface deterioration, and hidden moisture intrusion before they become major problems.
They also select caulking products that match the roof material, ensuring strong adhesion, flexibility, and long-term weather resistance. Proper surface preparation, precise application techniques, and routine inspections help maintain a watertight seal around vents, skylights, seams, and other roof penetrations.
By combining expert knowledge with preventive maintenance, RV owners can avoid common repair mistakes, extend roof lifespan, improve overall performance, and reduce the risk of unexpected leaks during travel or storage.
Conclusion:
Proper RV roof sealing involves much more than applying a bead of caulk and hoping for the best. Selecting the correct sealant, preparing the surface thoroughly, following proper application techniques, monitoring weather conditions, and performing regular inspections all contribute to long-term roof performance.
By avoiding these common RV roof sealing mistakes, you’ll cut repair costs, stop water damage, and extend your roof’s life. For expert care, trust Nagel Trailer Repair—your RV roof expert in Michigan.
Consistent maintenance matters, but professional checks ensure lasting protection. Don’t wait for leaks; schedule a roof inspection today and keep your RV road-ready season after season.