Michigan weather can punish your camper roof fast. Heavy snow, ice, and sudden rain test every seam, and even a small crack can turn into a costly headache. If you want to keep your RV dry and road-ready, you need to act before damage spreads.
Many owners ignore tiny gaps until leaks appear. Water seeps in, insulation weakens, and repairs become expensive. Unpredictable temperature swings in Michigan make sealants crack and fail sooner than expected.
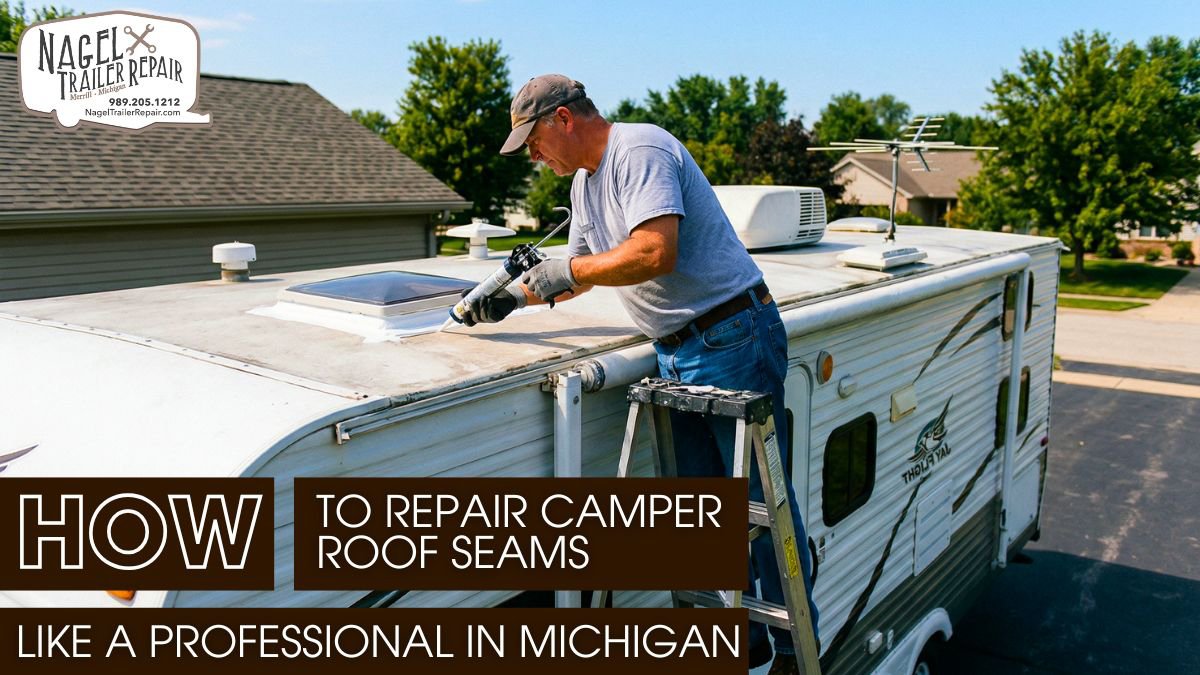
This guide shows you how to repair camper roof seams like a professional. You’ll learn practical steps from a camper roofing expert in Michigan to seal your roof with confidence. Don’t risk costly water damage; use these proven techniques to ensure your RV stays bone-dry and adventure-ready!
What is Camper Roof Seam Repair?
Camper roof seams take more abuse than most owners realize. Every time your RV sits through a Michigan winter or heats up under summer sun, the roofing materials expand and contract. That movement stresses every joint, especially around vents, skylights, and edges where different materials meet. Over time, even high-quality sealants begin to lose flexibility and adhesion.
Most RV roofs use EPDM rubber, TPO membranes, or fiberglass panels. Each material behaves differently under stress, but they all rely on sealants to stay watertight. Once those sealants degrade, water finds a way in. It doesn’t need a large opening—microscopic cracks are enough to start the process.
In Michigan, freeze–thaw cycles accelerate this damage. Water enters tiny gaps, freezes overnight, and expands. That expansion widens the crack and weakens the surrounding bond. Add UV exposure into the mix, and the sealant slowly becomes brittle, chalky, and prone to failure.
You should pay attention to early warning signs before leaks become obvious:
- Fine cracks forming along sealant edges
- Slight lifting or peeling at seam lines
- Faded or chalky sealant surfaces
- Soft spots underfoot on the roof
- Musty smells or stains inside the camper
When you catch these issues early, you can repair them quickly and prevent structural damage to the roof deck.
Tools and Materials Needed:
If you want professional-level results, you need the right tools and materials. Improvising with household tools often leads to uneven application or accidental damage to the roof membrane.
Start with the basics. A plastic scraper works best for removing old sealant without cutting into the roofing material. A high-thrust caulking gun gives you better control, especially when working with thick, cold-weather sealants. A heat gun helps soften stubborn sealant, but you must use it carefully to avoid overheating the surface.
You should also use diagnostic tools to improve accuracy:
- An infrared thermometer to confirm surface temperature
- A moisture meter to ensure the substrate is dry
- A seam roller to properly bond repair tapes
Material choice matters even more in a state like Michigan. Standard sealants may fail quickly under extreme temperature swings. You need products designed for flexibility and durability.
Key materials include:
- Self-leveling lap sealant for flat roof seams
- Non-sag sealant for vertical joints
- Butyl tape for sealing under flanges
- Micro-sealant repair tape for long-term reinforcement
Look for products with these characteristics:
- Wide temperature tolerance (well below freezing)
- Strong UV resistance
- High elongation to handle movement
- Compatibility with your roof material
Don’t overlook safety. Roof work always carries risk, especially on slightly wet or sloped surfaces.
- Wear slip-resistant shoes
- Use gloves to handle chemicals
- Protect your eyes during scraping and cleaning
Inspecting Roof Seams Properly:
A thorough inspection sets the foundation for a successful repair. You shouldn’t rush this step. Instead, approach it like a detailed assessment.
Divide the roof into sections and inspect each one carefully. Focus on seams, edges, and areas around installed components like vents and air conditioning units. These spots experience the most movement and stress.
Start with a visual inspection in good lighting. Sunlight helps reveal cracks, bubbles, and discoloration. Then move on to a hands-on check. Use a blunt tool or your fingers to gently press along the sealant. If it feels loose or brittle, it likely needs replacement.
Pay attention to these indicators:
- Gaps forming between sealant and surface
- Small air pockets under the sealant
- Rusted or loose fasteners
- Uneven or dried-out sealant texture
If you suspect hidden leaks, you can test further. A controlled water test—using low pressure—can help trace where water enters. For more advanced checks, professionals sometimes use thermal imaging or dye testing to detect moisture trapped beneath the surface.
Take notes or photos during your inspection. This habit helps you track problem areas and ensures you don’t miss anything during repair.
Cleaning and Preparation Steps:
Preparation determines how well your repair will hold over time. Even the best sealant will fail if applied over dirt, oil, or moisture.
Start by removing all damaged or loose sealant. Use a plastic scraper and work slowly to avoid tearing the roof membrane. If the sealant resists removal, apply gentle heat to soften it. Keep the temperature controlled to prevent damage.
Once you remove the old material, clean the surface thoroughly. Any residue left behind can weaken adhesion.
- Use isopropyl alcohol or a manufacturer-approved cleaner
- Wipe until the surface feels smooth and residue-free
- Avoid harsh solvents that can degrade rubber membranes
After cleaning, focus on drying. Moisture trapped beneath new sealant will cause failure.
- Check moisture levels with a meter if possible
- Allow extra drying time in humid conditions
- Avoid working early in the morning when dew may be present
Temperature also plays a role. Most sealants require a minimum surface temperature to bond properly. If the roof feels cold to the touch, verify it with a thermometer before proceeding.
Skipping or rushing preparation often leads to peeling, bubbling, or early sealant failure. Taking your time here ensures a strong, lasting bond.
Applying Sealant Like a Professional:
Applying sealant may seem simple, but technique makes a major difference. A clean, consistent application ensures the seam remains watertight under stress.
Choose the right sealant for the job. Use self-leveling products on flat surfaces so the material spreads evenly. For vertical or angled areas, use non-sag sealant to keep it in place.
When applying:
- Cut the nozzle at an angle for better control
- Apply a continuous bead without breaks
- Keep steady pressure on the caulking gun
- Cover the entire seam evenly
Avoid over-applying. Thick layers can trap air and cure unevenly. Instead, aim for a smooth, consistent bead that fully covers the seam.
For added durability, reinforce critical seams with repair tape. This approach creates a secondary barrier that handles movement better than sealant alone.
- Place the tape carefully over the seam
- Press it down firmly with a roller
- Remove any trapped air bubbles
Curing is just as important as application.
- Allow the sealant to set without disturbance
- Keep the surface dry during curing
- Avoid exposing it to freezing temperatures too soon
When you follow these steps carefully, you create a seal that can handle years of expansion, contraction, and weather exposure.
Camper Roof Maintenance Tips:
Even a perfect repair won’t last forever. Regular maintenance keeps your roof in top condition and prevents unexpected leaks.
Plan inspections at least twice a year. Spring checks help you identify winter damage, while fall inspections prepare your camper for colder months.
During maintenance:
- Remove debris like leaves and dirt
- Check for new cracks or lifting sealant
- Ensure all seams remain flexible and intact
Michigan winters can be especially harsh. Snow accumulation and ice buildup put extra stress on seams. Clearing debris and ensuring proper drainage helps reduce this pressure.
Adopt good usage habits:
- Avoid walking on the roof in freezing conditions
- Store your camper under cover when possible
- Use breathable covers to prevent trapped moisture
Keep a simple maintenance record. Track when you applied sealant and note any repairs. This practice helps you anticipate when resealing may be needed, typically every few years depending on exposure.
Staying proactive reduces long-term costs and keeps your camper ready for travel.
The Role of Professional Maintenance:
Professional maintenance keeps your camper roof performing under constant environmental stress. When you approach seam repair with precision, you don’t just fix visible damage—you restore the entire waterproofing system. You clean surfaces thoroughly, select climate-appropriate sealants, and apply them with controlled technique to ensure long-term adhesion and flexibility. This level of care prevents microcracks from turning into major leaks.
Consistent upkeep also strengthens camper roof joints against water intrusion. You reinforce high-stress areas, monitor sealant elasticity, and reapply protective layers before failure begins. By following professional standards, you improve water resistance, reduce structural risk, and extend the lifespan of your camper without relying on reactive repairs.
Conclusion:
Repairing camper roof seams requires attention to detail and a solid understanding of how materials behave under stress. When you approach the job methodically, you prevent water intrusion and extend the life of your RV roof.
Regular inspection and maintenance play an equally important role. Small issues develop quickly in Michigan’s climate, so addressing them early keeps repairs manageable and cost-effective.
With the right tools and preparation, you can achieve professional results. However, for a flawless finish, Nagel Trailer Repair offers elite care. As a camper roofing expert in Michigan, we ensure a well-sealed roof that protects your investment and motivates you to travel with total confidence.