Water damage can ruin a camper roof faster than most owners expect. Even small gaps in roof joints allow moisture to seep inside, causing mold, stains, and costly structural repairs. Ignoring these weak spots often turns a minor issue into a major headache during heavy rain or long road trips.
Many camper owners struggle with cracked sealants, hidden leaks, and poor waterproofing. Without proper sealing, roof joints weaken over time due to heat, UV exposure, and constant movement on the road. Finding the right method can feel confusing and time-consuming.
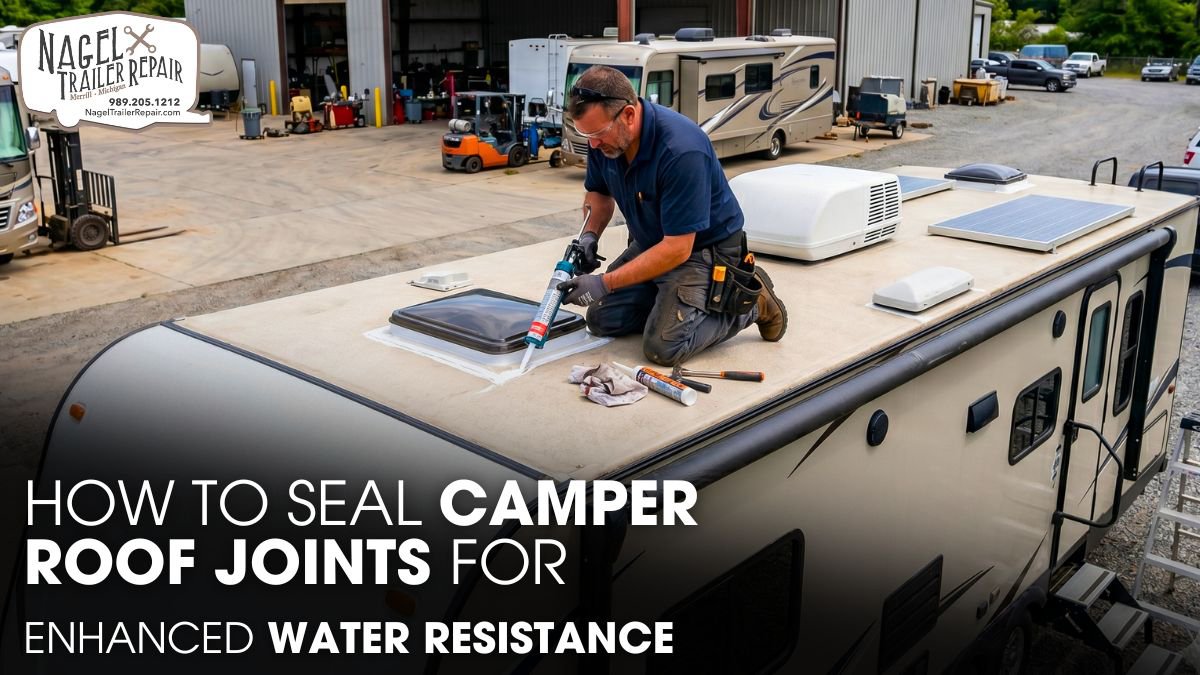
This guide, shared by a camper roof expert in Michigan, shows you how to seal camper roof joints properly for stronger water resistance and longer roof life. Learn essential tools, prep steps, and sealing techniques to prevent leaks—so trust a pro to keep your camper protected all season.
Understanding Camper Roof Joints:
Camper roof joints handle far more stress than most RV owners realize. Every time the camper moves down the road, the roof flexes slightly. Heat from the sun expands the roofing materials during the day, while cooler nighttime temperatures cause them to contract. Over time, this constant movement weakens roof seams and creates tiny openings where water can enter.
Most camper roofs use materials such as EPDM rubber, TPO membrane, fiberglass, or aluminum. Each material responds differently to weather exposure, UV radiation, and temperature shifts. Rubber roofs usually need highly flexible sealants because the membrane expands and contracts more than fiberglass or aluminum panels.
The joints around roof penetrations remain the most vulnerable sections of the entire roof system. Areas around air conditioners, roof vents, skylights, antennas, and solar panel mounts experience continuous vibration and movement. Even a small crack in these areas can allow moisture to travel beneath the roofing membrane and soak the insulation or roof decking underneath.
Water intrusion rarely stays in one place. Once moisture enters the roof system, it spreads through insulation layers, wood framing, and ceiling panels. In many cases, RV owners notice interior stains long after structural damage has already started.
Common leak-prone areas include:
- Roof vent edges
- Front and rear termination bars
- AC mounting flanges
- Sidewall seams
- Ladder attachment points
- Plumbing vent bases
- Solar cable entry ports
UV exposure also plays a major role in sealant failure. Constant sunlight dries out older sealants and causes them to crack or shrink. Road vibration adds even more stress, especially during long trips or off-road travel.
Tools and Sealants Needed:
Using the right tools and sealants makes a major difference in the quality and lifespan of the repair. Many camper owners make the mistake of using household silicone caulk, but standard silicone products often fail on RV roofs because they cannot handle constant movement and weather exposure.
Before starting the job, gather these essential tools:
- Plastic scraper
- Soft cleaning brush
- Caulking gun
- Utility knife
- Seam roller
- Microfiber cloths
- Nitrile gloves
- Moisture meter
- Denatured alcohol
- Masking tape
A moisture meter helps detect hidden water beneath the roof surface before visible damage appears. This tool becomes especially useful when inspecting older campers that may already have trapped moisture inside the roof decking.
Choosing the correct sealant matters just as much as the preparation process. Self-leveling lap sealants work best on flat or horizontal roof surfaces because they spread evenly across seams and screw heads. These sealants create a smooth waterproof barrier around vents, skylights, and roof accessories.
For vertical joints or side seams, non-sag sealants provide better control because they stay in place without dripping. Butyl tape also works extremely well beneath mounting flanges and termination rails because it stays flexible for years and forms a compression-based waterproof seal.
Many RV technicians prefer EternaBond roof tape for long-term seam reinforcement. This tape uses advanced micro sealant technology that bonds tightly to roofing materials and resists UV damage, moisture, and temperature changes.
Avoid these common mistakes during material selection:
- Using petroleum-based products on EPDM roofs
- Mixing incompatible sealants
- Applying silicone over old lap sealant
- Using low-grade construction caulk
- Ignoring manufacturer compatibility guidelines
Using the wrong product may cause premature cracking, poor adhesion, or membrane damage within a short period.
Preparing the Camper Roof Surface:
Proper surface preparation determines whether the new sealant lasts for years or starts failing after a few months. Even high-quality sealants cannot bond properly to dirty, wet, or oxidized surfaces.
Start by cleaning the entire roof carefully. Remove all dirt, oxidation, debris, tree sap, grease, and loose particles from the seams and roof penetrations. Use an RV-safe roof cleaner that will not damage rubber membranes or fiberglass surfaces.
Avoid using harsh solvents or aggressive pressure washing near roof seams. High-pressure water can force moisture beneath the membrane and weaken the roof structure.
After cleaning the roof, inspect all joints closely for signs of damage, including:
- Cracked sealant
- Loose edges
- Rusted screws
- Soft roof decking
- Bubbling sealant
- Water stains near penetrations
Use a plastic scraper to remove damaged or lifting sealant. Metal scrapers can tear rubber membranes or scratch fiberglass roofs, so work carefully around sensitive areas. Once you remove the old sealant, wipe the area with denatured alcohol or isopropyl alcohol. This step removes oils, residue, and contaminants that could interfere with adhesion.
Temperature and humidity also affect sealing performance. Most professional RV sealants bond best when surface temperatures remain between 50°F and 80°F. High humidity slows the curing process, while extreme heat may cause the sealant to skin over too quickly before it settles properly.
Inspect all mounting hardware before applying fresh sealant. Loose screws around vents or AC units often create hidden leak paths. Replace rusted fasteners with stainless steel hardware whenever possible to improve long-term durability.
Applying Roof Sealant Correctly:
Applying sealant correctly requires patience, steady application, and careful attention to detail. Even the best sealant cannot perform properly if gaps, air pockets, or uneven coverage remain along the seam.
Start by masking the seam edges if you want cleaner application lines. Cut the sealant nozzle at a 45-degree angle and load the tube into a quality caulking gun. Apply steady pressure while moving slowly along the seam.
For horizontal roof joints, use self-leveling lap sealant. Apply a continuous bead that fully covers seam edges, exposed screws, and transition points. The sealant will naturally spread and settle into small gaps as it cures.
When sealing around roof penetrations:
- Cover all fastener heads completely
- Extend the sealant beyond seam edges
- Avoid leaving thin spots
- Remove trapped air pockets
- Maintain consistent bead thickness
If you use butyl tape beneath mounting flanges, compress the tape evenly while tightening the screws. Over-tightening the hardware can force too much tape out from beneath the flange and weaken the seal.
EternaBond roof tape requires extra surface preparation for maximum adhesion. Clean the area thoroughly, remove oxidation completely, and apply the tape slowly to prevent wrinkles or trapped air bubbles. Use a steel seam roller to activate the adhesive and create full surface contact.
Many RV owners apply excessive sealant, thinking thicker coverage provides better protection. In reality, oversized beads collect debris, trap moisture, and crack faster over time. Controlled and even application creates a much stronger waterproof seal.
After application, allow the sealant to cure fully before exposing the roof to rain or washing. Depending on the product and weather conditions, curing may take between 24 and 72 hours.
Carefully inspect the finished work for:
- Pinholes
- Missed sections
- Lifting edges
- Uneven coverage
- Air bubbles
Small defects can quickly turn into major leak points if left uncorrected.
Checking for Water Resistance:
After sealing the joints, test the roof carefully to confirm that the repair worked properly. Many hidden leaks remain unnoticed until they cause serious interior damage. Start with a visual inspection. Check all seams and roof penetrations for complete sealant coverage and proper edge adhesion. Use a flashlight to inspect corners, overlap sections, and screw heads closely.
Next, perform a controlled water test. Spray water gradually across the roof using a hose while another person checks the camper interior for leaks. Work slowly from lower sections upward to avoid false leak readings caused by water runoff.
Professional RV repair shops often use advanced testing methods such as:
- Moisture meter scanning
- Infrared thermal inspection
- Electronic leak detection
- Pressurized air testing systems
Pressure-based systems help identify extremely small leak paths that standard visual inspections may miss.
Pay close attention to hidden moisture near:
- Ceiling corners
- Cabinets
- Roof vent openings
- Interior wall seams
- Lighting fixtures
Water often travels far from the original leak source before becoming visible inside the camper. If leaks continue after resealing, inspect the roof structure beneath the membrane. In some cases, damaged roof decking or loose framing components may contribute to recurring water intrusion.
Long-Term Camper Roof Maintenance:
Regular maintenance keeps camper roof joints in good condition and helps prevent expensive structural repairs. Even high-quality sealants gradually wear down due to UV exposure, weather conditions, and constant roof movement.
Inspect the roof every few months and after severe storms or long road trips. Frequent inspections help identify small problems before they turn into major leaks.
A good maintenance routine should include:
- Cleaning roof surfaces regularly
- Removing leaves and debris
- Checking sealant flexibility
- Inspecting roof penetrations
- Tightening loose hardware
- Monitoring drainage areas
Standing water creates additional stress on roof seams and accelerates sealant deterioration. Keep drainage paths clear so water can flow off the roof properly. UV exposure remains one of the biggest causes of sealant breakdown. Over time, sunlight dries out the sealant surface and causes cracking. Approved UV protectants can help extend sealant life and reduce oxidation on rubber roofs.
Avoid unnecessary foot traffic on the roof whenever possible. Concentrated weight can weaken seams, damage insulation, and create stress fractures in older roofing materials. Consistent maintenance can extend the life of a camper roof by more than a decade while reducing the risk of sudden leaks during travel.
The Role of Professional Maintenance:
Professional roof maintenance helps camper owners prevent hidden leaks, structural moisture damage, and costly repairs. Experienced technicians inspect roof seams, seal weakened joints, and identify early signs of membrane deterioration before water penetrates the interior. Regular servicing also improves roof durability and keeps the camper protected during heavy rain, heat, and long-distance travel.
Experts also repair damaged roof vents, replace cracked vent covers, and secure loose mounting hardware to maintain proper ventilation and weather resistance. Routine inspections ensure every roof component performs correctly, reduces long-term maintenance expenses, and extends the overall lifespan of the RV roof system
Conclusion:
Properly sealed camper roof joints protect the entire RV structure from moisture intrusion, insulation damage, mold growth, and costly structural repairs. High-quality sealants, correct surface preparation, and accurate application methods significantly improve long-term roof durability and water resistance.
Regular roof inspections and preventive maintenance help identify weak seams, cracked sealants, and hidden leaks before major damage develops. Consistent upkeep also extends membrane lifespan and improves overall camper performance in harsh weather conditions.
By choosing Nagel Trailer Repair, a trusted camper roof expert in Michigan, and following the right sealing techniques, you’ll prevent leaks, cut repair costs, and enjoy a durable roof—keeping your travels safe, dry, and worry-free.