A hidden leak in your camper can quietly drain water, damage interiors, and ruin your trip plans before you even notice. A small drip behind a panel or under a sink can escalate fast, turning a simple outing into an expensive repair situation.
Most camper owners struggle to detect leaks early because water lines run through tight, concealed spaces. Without the right tools, you may only notice the issue after mold, low pressure, or visible damage appears—when fixing it becomes more complicated and costly.
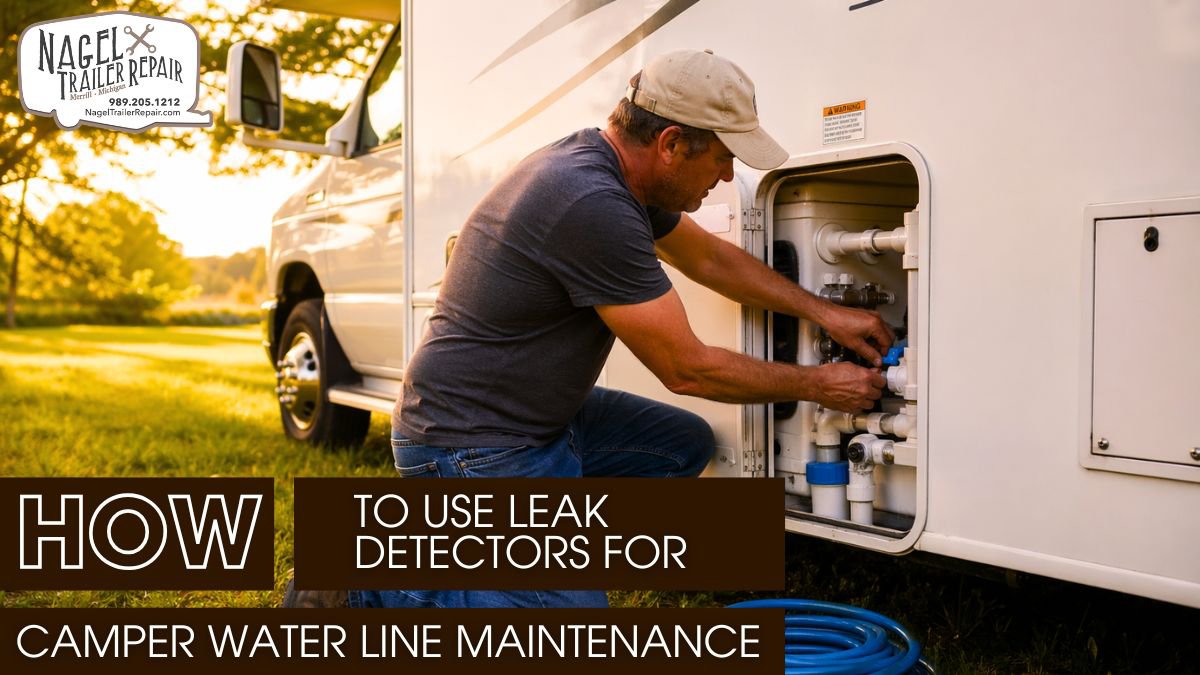
This guide helps you use leak detectors to catch issues early and maintain your water system. While DIY is great, visiting a professional camper repair shop in Michigan ensures your rig stays adventure-ready. Protect your setup with expert care to keep every future road trip stress-free!
Why Leak Detection Matters?
Your camper’s water system works harder than it looks. It runs through tight spaces, bends around corners, and absorbs constant vibration from the road. Most systems rely on PEX tubing paired with crimp or push-fit fittings, all operating within a typical pressure range of 40–55 PSI. While PEX is flexible and durable, it still expands and contracts with temperature changes. Over time, this movement weakens joints, loosens fittings, and creates tiny stress fractures.
Leaks rarely start as obvious problems. They begin as microscopic openings at connection points or along stressed sections of tubing. Because many water lines sit behind panels or under flooring, you won’t see the issue right away. Instead, water slowly accumulates, soaking insulation and wood structures. By the time you notice a musty smell or warped surface, the damage has already spread.
Even a small leak can release a surprising amount of water under pressure. A pinhole leak smaller than a millimeter can waste several liters per day. That constant exposure leads to mold growth, corrosion, and even electrical risks if moisture reaches wiring or control systems.
Ignoring leaks also affects system performance. Your pump cycles more often to maintain pressure, which increases wear and shortens its lifespan. You may also notice inconsistent water flow or pressure drops during use.
Key risks you should watch for include:
- Hidden moisture buildup behind walls
- Gradual loss of water pressure
- Increased pump cycling frequency
- Structural weakening of flooring
- Mold and mildew development
When you detect leaks early, you stay in control. You protect your camper’s structure, reduce repair costs, and keep your water system running efficiently.
Types of Leak Detectors:
Not all leak detectors work the same way, and choosing the right type makes a big difference. Each system relies on a specific detection method, so understanding how they function helps you get more accurate results.
Moisture sensors are the most straightforward option. These devices use two or more conductive probes. When water touches both probes, it completes an electrical circuit and triggers an alert. You place them in areas where water is likely to collect, such as under sinks, near the pump, or beside the water heater. They don’t tell you where the leak started, but they quickly confirm that water is present.
Pressure-based detectors take a more technical approach. They monitor the internal pressure of your plumbing system when no water is in use. In a sealed system, pressure should remain stable. If it drops, even slightly, that signals a leak somewhere in the line. High-quality pressure sensors can detect very small pressure changes, making them ideal for finding slow or hidden leaks.
Smart leak detection systems combine multiple technologies. They often include flow sensors, pressure monitors, and wireless connectivity. These systems track how water moves through your camper and alert you when something looks unusual. Some models even shut off the water supply automatically if they detect continuous flow that suggests a leak.
Here’s how these systems compare:
- Moisture sensors: simple, affordable, location-based alerts
- Pressure detectors: precise, ideal for hidden leaks
- Smart systems: real-time monitoring and automation
If you want reliable protection, consider using more than one type. A layered setup gives you both immediate alerts and deeper system insight.
Tools You’ll Need:
Having the right tools makes leak detection and repair much easier. Without proper equipment, you might identify a problem but struggle to fix it correctly.
Start with tools designed specifically for PEX plumbing. A PEX cutter ensures clean, square cuts, which are critical for creating tight seals. If the cut is uneven, the fitting may not seat properly, leading to future leaks. A crimping tool is equally important. It applies uniform pressure to secure fittings, and using the correct size ensures a reliable connection.
You should also include a pressure gauge in your toolkit. A digital gauge gives you more accurate readings than an analog one and helps you track pressure changes over time. This is especially useful when diagnosing slow leaks.
Basic plumbing supplies are just as important. PTFE (Teflon) tape helps seal threaded connections, while pipe sealant adds an extra layer of protection. Keeping spare fittings and short lengths of tubing on hand allows you to make quick repairs without delays.
Essential tools and supplies include:
- PEX cutter for precise pipe cuts
- Crimping tool with proper calibration
- Digital pressure gauge for accuracy
- PTFE tape and pipe sealant
- Adjustable wrench for fittings
- Flashlight or inspection camera
- Spare connectors and tubing
Don’t overlook safety. Always turn off power to nearby electrical components before working in damp areas. Wearing gloves and eye protection reduces the risk of injury.
A well-prepared toolkit helps you move from detection to repair without unnecessary complications.
How to Use Leak Detectors:
Using leak detectors effectively requires a methodical approach. If you place sensors randomly or skip baseline measurements, you may miss important signs or misinterpret the data.
Start by identifying high-risk areas in your camper. Focus on spots where leaks are most likely to occur, such as pump connections, T-joints, elbows, and areas exposed to constant vibration. Install moisture sensors at the lowest points in these areas, since water naturally flows downward and collects there.
For pressure testing, close all faucets and ensure no appliances are using water. Turn on the pump and allow it to reach its cutoff pressure. Once it stops, monitor the pressure reading. In a stable system, the pressure should hold steady. If it begins to drop, even slowly, you likely have a leak.
Smart systems require initial setup and calibration. You need to establish a baseline by observing normal water usage patterns. This helps the system recognize what counts as abnormal flow.
Follow these best practices for accurate results:
- Record baseline pressure after stabilization
- Monitor pressure over consistent time intervals
- Compare readings across multiple tests
- Combine sensor data with visual checks
- Look for trends, not just single readings
You should also use your senses. Listen for unexpected pump activity, feel for damp surfaces, and check for subtle signs like condensation or discoloration.
Consistency is what makes detection effective. Regular monitoring helps you catch problems early and avoid larger repairs later.
Fixing Leaks in Camper Water Line:
Once you confirm a leak, you need to act quickly but carefully. Rushing into repairs without identifying the exact source can lead to wasted effort and incomplete fixes.
Start by isolating sections of your plumbing system. Shut off specific lines and monitor pressure changes to narrow down the location. This step saves time and prevents unnecessary disassembly.
Temporary fixes can help you manage a leak during a trip. Materials like silicone repair tape or epoxy putty can seal small leaks for a short period. However, these solutions are not designed to handle long-term pressure and temperature changes.
For a permanent fix, you need to replace or properly reseal the affected section. Cut out the damaged portion of tubing and install a new piece using secure fittings. Make sure your cuts are clean and your crimps are properly aligned.
Important repair practices include:
- Use precise cuts to ensure tight seals
- Apply correct crimping pressure
- Avoid over-tightening threaded joints
- Replace worn seals and O-rings
- Test the system after completing repairs
If the leak sits behind walls or near electrical wiring, consider calling a professional. Specialized tools like thermal imaging cameras can locate hidden leaks without damaging your camper’s structure.
Taking a precise and careful approach ensures your repair lasts and prevents the issue from returning.
Maintenance Tips & Best Practices:
Preventive maintenance keeps your water system reliable and reduces the chances of unexpected leaks. Instead of waiting for problems, you should build a routine that keeps everything in check.
Inspect your system regularly. Look for loose fittings, discoloration, or small signs of moisture. Monthly checks during active use and inspections before long trips help you catch early warning signs.
Managing water pressure is one of the most effective ways to prevent leaks. Excessive pressure stresses fittings and accelerates wear. A pressure regulator keeps your system within a safe range, usually between 40 and 50 PSI.
Seasonal maintenance is just as important. Before winter, drain your system completely and add RV-safe antifreeze. This prevents water from freezing and expanding inside the pipes, which can cause hidden cracks.
Best practices to follow include:
- Maintain consistent pressure levels
- Drain water before storage
- Use antifreeze in cold conditions
- Check fittings after long drives
- Recalibrate smart detectors regularly
- Replace aging components proactively
Proper ventilation also helps reduce humidity inside your camper. Lower humidity means less condensation, which reduces the chance of false alarms from moisture sensors.
When you stay proactive, you extend the life of your system and avoid costly repairs.
The Role of Professional Maintenance:
Professional maintenance brings precision and efficiency to tasks that often overwhelm DIY efforts. Technicians use advanced leak detection tools like pressure decay testers and thermal imaging to locate hidden water line issues without unnecessary dismantling. They also ensure proper calibration of sensors and verify system integrity under real operating conditions.
When it comes to slide-out mechanisms, professionals handle alignment, motor calibration, and track lubrication with accuracy. They quickly diagnose issues like gear wear or seal failure and apply lasting fixes. Their expertise reduces downtime, prevents repeat failures, and keeps your camper systems running smoothly and safely.
Conclusion:
Effective leak detection shifts your camper maintenance from guesswork to precision. When you consistently monitor pressure, moisture, and flow, you gain clear insight into your system and catch problems before they escalate.
By pairing reliable detection tools with proper repair techniques, you stop small leaks from turning into major damage. This approach protects your camper’s structure, improves system performance, and reduces long-term costs.
Stay consistent with inspections and preventive care. For expert service, Nagel Trailer Repair ensures your water system stays efficient and safe. As the premier camper repair shop in Michigan, we handle the hard work so you can enjoy every trip without disruptions. Book today for total peace of mind!