
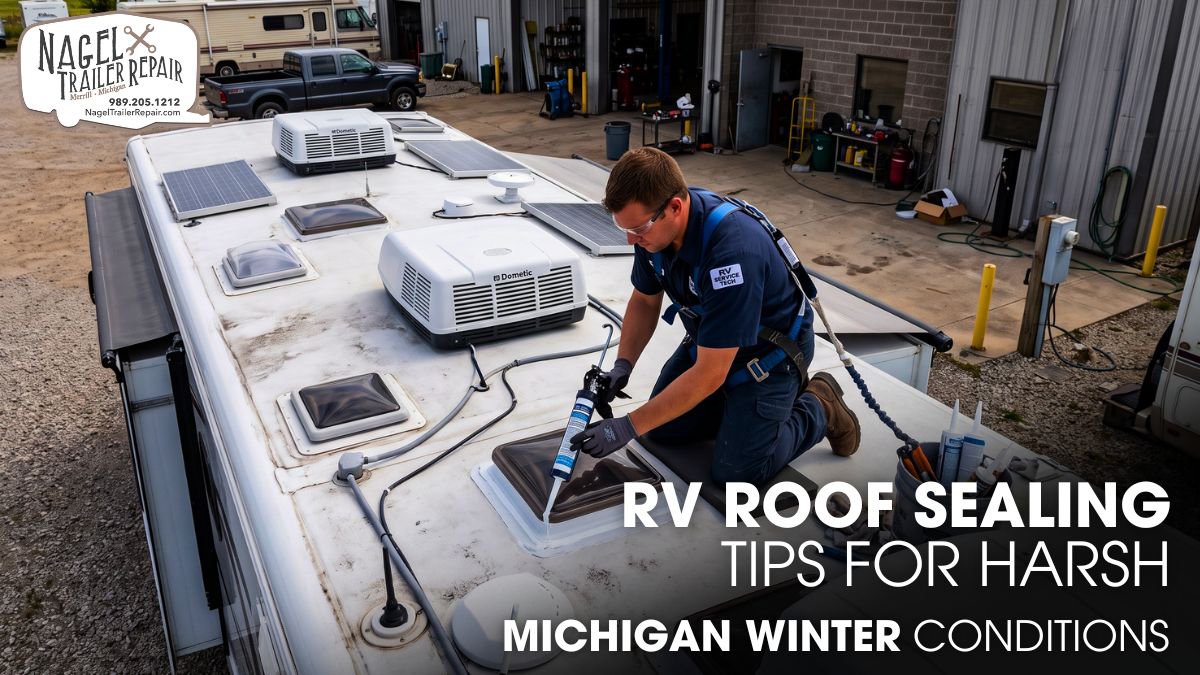
Michigan winters expose RV roofs to heavy snow, freezing temperatures, ice, wind, and repeated freeze-thaw cycles. These conditions can quickly test every seam, joint, vent, and roof penetration, making proper sealing essential before winter arrives.
A small crack or failed seal can allow moisture to penetrate the roof system. As temperatures drop, trapped water can freeze, expand, and worsen the damage. Without timely maintenance, minor sealing issues can develop into costly leaks, insulation damage, and structural deterioration.
Prepare your RV for Michigan’s harsh winter with proper roof sealing and timely repairs. An RV roof expert in Michigan can identify weak spots, replace failing sealant, and prevent costly moisture damage. Schedule professional RV roof repair to keep your camper protected all season.
Michigan Winter RV Roof Risks:
Michigan winter weather creates a particularly demanding environment for an RV roof assembly. Snow adds sustained weight, while low temperatures can make some sealants less flexible. The bigger concern comes from repeated freeze-thaw cycling. When water enters a tiny crack and freezes, it expands and places additional stress on the surrounding sealant, membrane, and substrate.
The roof also experiences thermal movement. A roof exposed to winter sunlight can warm during the day and fall well below freezing overnight. That repeated dimensional movement forces joints to expand and contract. A sealant that has already lost elasticity may no longer accommodate that movement.
Snow and ice can conceal early roof damage, allowing moisture to collect around vents, gutters, roof penetrations, and perimeter seams. Professional RV roof sealing in Michigan helps identify vulnerable areas early, prevent hidden water intrusion, and protect your RV through harsh weather. Schedule expert RV roof repair before minor defects become costly damage.
Key winter failure mechanisms include:
- Freeze-thaw expansion inside small defects
- Sealant cracking from thermal movement
- Water migration beneath roofing membranes
- Snow and ice loading on the roof structure
- Moisture-related deterioration of roof decking
- Loss of adhesion at penetrations and seams
Inspecting Your RV Roof Before Winter:
Start with a complete visual and physical inspection before placing the RV into winter storage. Clean the roof first because dirt, oxidation, biological growth, and old sealant residue can conceal small cracks.
Inspect the membrane for punctures, cuts, abrasion, bubbles, wrinkles, exposed substrate, and areas that appear loose. Then examine every penetration where another component interrupts the roof membrane. Air-conditioning units, skylights, plumbing vents, antennas, solar mounts, refrigerator vents, ladder brackets, and roof accessories all create potential water-entry points.
Do not judge a sealant only by its appearance. A bead can look intact while losing adhesion underneath. Carefully check for edges that have lifted away from the substrate, gaps between components, hardened sections, and cracks extending through the sealant.
A practical inspection should cover:
- Entire roof membrane
- Perimeter and roof-to-wall transitions
- Vent and skylight flanges
- HVAC and plumbing penetrations
- Fasteners and mounting brackets
- Interior ceiling areas below roof penetrations
If you notice a soft roof section or interior water stains, have the underlying substrate inspected before resealing. An RV roofing shop in Michigan can identify moisture damage and structural issues that sealant alone cannot fix. Professional RV roof repair helps prevent hidden damage, costly repairs, and further leaks.
Choosing the Right RV Roof Sealant:
Sealant selection directly affects winter reliability. EPDM, TPO, PVC, fiberglass, aluminum, and coated roof systems do not have identical surface chemistry. A product that adheres well to one material may perform poorly on another.
Always identify the roof membrane before buying a sealant. Read the technical data sheet and confirm substrate compatibility, application temperature, curing requirements, elongation, adhesion characteristics, and weather resistance. Manufacturer documentation should take priority over generic online recommendations.
For example, Sika lists an RV-compatible sealant with an application range of 41°F to 104°F, demonstrating why temperature matters during installation. Another RV sealing product specifies application between 40°F and 95°F. These ranges make a late-fall Michigan repair much more dependent on weather conditions than a summer application.
Consider these technical factors:
- EPDM or TPO compatibility
- Minimum application temperature
- Required curing conditions
- UV and weather resistance
- Elasticity and movement capability
- Adhesion to existing substrates
- Compatibility with previously applied sealants
Self-leveling lap sealants work well on horizontal roof joints, creating a continuous barrier against moisture. Non-sag formulas provide better control on vertical or sloped areas. For lasting protection, professional RV roof repairs in Michigan can address vulnerable seals before leaks and winter damage worsen.
Proper RV Roof Sealing Techniques:
Good sealing begins before the sealant leaves the cartridge. Remove dirt, grease, oxidation residue, loose coatings, and failed sealant from the bonding area. Use only cleaning agents approved for the particular roof material. Aggressive solvents can damage certain membranes or interfere with adhesion.
Remove loose or cracked sealant carefully rather than simply burying it beneath a new bead. If the old material has lost adhesion, the new sealant may bond to a weak layer and fail with it.
The surface must remain clean and dry. Michigan’s cool, humid conditions can extend drying time, so verify the surface condition instead of assuming that it has dried sufficiently.
When applying the new sealant, create a continuous bead around the entire joint. Avoid pinholes, gaps, abrupt changes in thickness, and discontinuities around corners. Tool the bead according to the product instructions so it contacts the intended bonding surfaces.
Follow these application principles:
- Remove deteriorated sealant before resealing.
- Avoid cutting or puncturing the membrane.
- Keep bonding surfaces clean and dry.
- Maintain continuous sealant coverage.
- Respect manufacturer temperature limits.
- Allow adequate cure time before exposing the repair.
Avoid ordinary household caulk when repairing your RV roof, as it cannot handle constant movement, UV exposure, moisture, and temperature changes. For effective RV roof maintenance in Michigan, use proper roofing sealants and professional repair services to prevent leaks, extend roof life, and protect your RV through demanding weather.
Protecting RV Roof Seals During Winter:
A properly sealed roof still needs protection after the RV enters storage. Heavy snow can create sustained structural loading, while ice can mechanically stress roof components. Follow the RV manufacturer’s instructions for maximum roof loading and snow removal.
Never attack bonded ice with a metal shovel or sharp scraping tool. A small puncture can create a major leak pathway once snow begins melting. Mechanical damage around a vent or seam can also be difficult to detect while the roof remains covered.
Keep drainage routes clear around roof edges and components to prevent melting water from pooling against sealant joints and refreezing. For lasting protection, professional RV roofing services in Michigan can identify weak areas, repair damaged seals, and help prevent costly leaks during harsh weather.
A breathable RV cover can help reduce direct exposure when the product suits the RV and storage conditions. However, a poorly fitted cover can rub against the membrane and create abrasion. Trapped condensation can also introduce another moisture problem.
During winter, focus on:
- Controlling excessive snow accumulation
- Avoiding aggressive ice removal
- Keeping drainage paths functional
- Preventing cover-related abrasion
- Checking accessible areas after severe weather
RV Roof Inspection and Maintenance:
Spring provides the next major opportunity to evaluate how the roof survived the winter. Do not assume that a roof remains watertight simply because you found no obvious interior leak during storage. Some moisture intrusion develops slowly and may remain inside insulation or roof decking.
Inspect every repaired area again. Look for sealant that has cracked, lifted, shrunk, hardened, or separated from the membrane. Compare questionable areas with photographs taken during the pre-winter inspection. This creates a useful condition record and makes progressive deterioration easier to identify.
Also inspect the interior. Ceiling discoloration, soft materials, unusual odors, or localized staining can indicate moisture migration.
Watch for:
- New sealant separation
- Membrane lifting or bubbling
- Soft roof decking
- Interior staining
- Corrosion around fasteners
- Persistent moisture around penetrations
Early intervention keeps damage from spreading. A small resealing job caught in time stays a small job, while months of moisture intrusion can rot the decking and require a far larger repair.
That damage progression explains why preventive sealing deserves attention. Addressing a small seal failure promptly is straightforward, provided the roof remains structurally sound.
However, professional inspection becomes more important when you find soft decking, delamination, widespread membrane damage, or persistent water intrusion.
The Role of Professional Maintenance:
Professional RV roof maintenance becomes especially important before a harsh Michigan winter. Experienced technicians can identify weak seams, hidden moisture intrusion, membrane damage, and adhesion failures that a routine visual inspection may miss. They can also select a compatible sealant, prepare the roof surface correctly, and restore critical roof penetrations to maintain a reliable moisture barrier.
Addressing these issues before freezing temperatures arrive can help prevent costly water damage. When technicians find degraded roof sealant, they should remove the failed material without damaging the underlying membrane.
They then clean and dry the bonding surface before applying a compatible replacement sealant in a continuous, uniform bead. Proper curing conditions also matter because cold temperatures can slow sealant performance. Professional repairs help restore joint flexibility, improve waterproofing, and protect the RV roof against repeated freeze-thaw cycles
Conclusion:
A winter-ready RV roof starts with precise inspection, compatible materials, and correct sealing techniques. Michigan’s freeze-thaw cycles can expose even small weaknesses, so owners should address damaged seams, penetrations, and membrane defects before storage.
Use manufacturer-approved sealants, prepare surfaces carefully, and respect application and curing temperatures. Avoid shortcuts that compromise adhesion or membrane integrity, especially when preparing an RV for months of snow and freezing weather.
After winter, inspect your RV roof and address early damage before it worsens. Nagel Trailer Repair provides dependable repairs to prevent moisture intrusion and protect your RV’s structure. Trust an RV roof expert in Michigan to restore roof integrity and extend its service life.